
By Robert L. Williams
A few weeks ago, we made our way into the distant recesses and found, to our shock, dozens of immense oak trees lying on the ground. Many of these trees were more than five feet in circumference.
The outer edge of the trees had rotted, but the inner wood was as sound as it had ever been. We cut the logs into sections and dragged them to the house, where we lumbered them. Then, we made beautiful doors.
You start with a log, a fallen tree, a huge timber you scavenged from an old building, or whatever other kind of heavy wood you can obtain at no cost — all work well to make quality, hand-crafted doors.
What kind of wood works best for making rustic doors? I have used oak, pine, poplar, hickory, and several other kinds of wood and thus far I have never found any that does not work well, as long as the wood is sound. For ease of working, poplar and pine are perhaps best. Both woods are soft and easy to saw or nail. They are also very easy to drill. Oak and hickory are among the hardest of the common wood, while you may have to work a little harder, you will have a splendid door when your project is finished.

Lumbering the wood
Elevate the log onto fair-sized sawing blocks, so the log is parallel to the earth but is a foot or so off the ground.
When the log is on the cutting blocks, use a chalk line to mark a straight line from one end of the log to the other. Mark the log as far to one side as you can and still have good wood.
When the log is chalked, use the tip of your chain saw bar and cut a groove one or two inches deep along the line. Then go back and slowly, gently, saw the slab you started all the way off.
Now you have one flat side to the log. Roll the log so that the flat side is facing upward and chalk lines on the extreme edge of the flat surface so that you can cut off two more slabs. Now the log is flat on three sides. Repeat for the remaining side.
Use a tape measure and mark a point two inches from the edge of the log on each end. Then chalk a line along the entire length of the log to connect the two marks. Cut a groove along the mark then carefully cut off the entire two-inch thick timber. Depending upon the size of the log, you now have a 2×6, a 2×8, or larger. For door-making purposes, it is easier to work with timbers no wider than six or eight inches.
Cut as many of the two-inch thick boards as you will need, but cut them as straight as you possibly can. You cannot make a great-looking door with uneven wood.
If you have never chain-sawed lumber from logs, you are in for a treat. It may take you a while to get the hang of it, but once you do, you can save a ton of money by cutting your own lumber. We have not bought a piece of timber or lumber since we discovered how to saw great boards for ourselves, and that was many years ago.
When you trim the boards, the easiest way is to use a small, portable planer, which can be bought for $300 or slightly more. Do not try to cut off too much at one pass through the planer. Set the blades high and take off only 1/16 of an inch until the entire board is smooth and even. Don’t forget to plane or trim the edges.
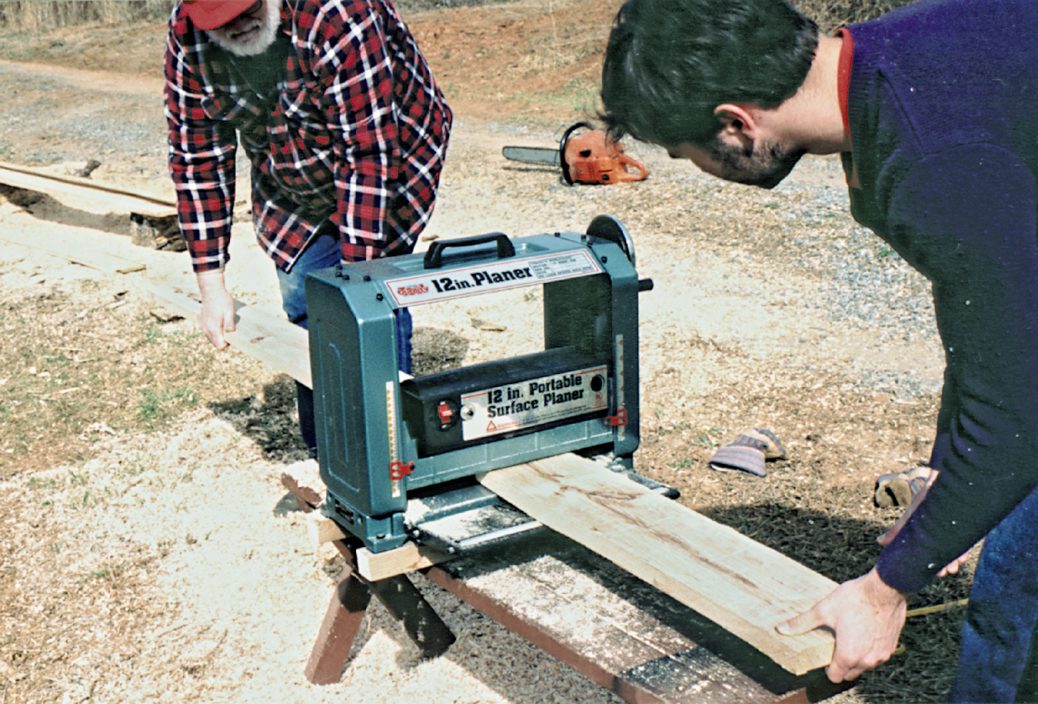
Incidentally, if you use a planer, you may not be able to plane a board that is more than six inches wide.
In such an instance you can use a power hand planer, one of the finest of modern tools. You can buy one much cheaper than what you will pay for a portable planer.
Stand the wood on edge and secure it with a C-clamp. Run the power hand planer across the edge until the surface seems uniformly smooth and even. Hold the timber up to eye level and sight down the top edge to see if you can notice any irregularities. Do the other side and you are ready for the portable planer.
You can also do the same work with a regular manual planer. The only difference is that the manual planer is harder work and takes slightly longer. But the manual planer is much cheaper.
Assembling the door
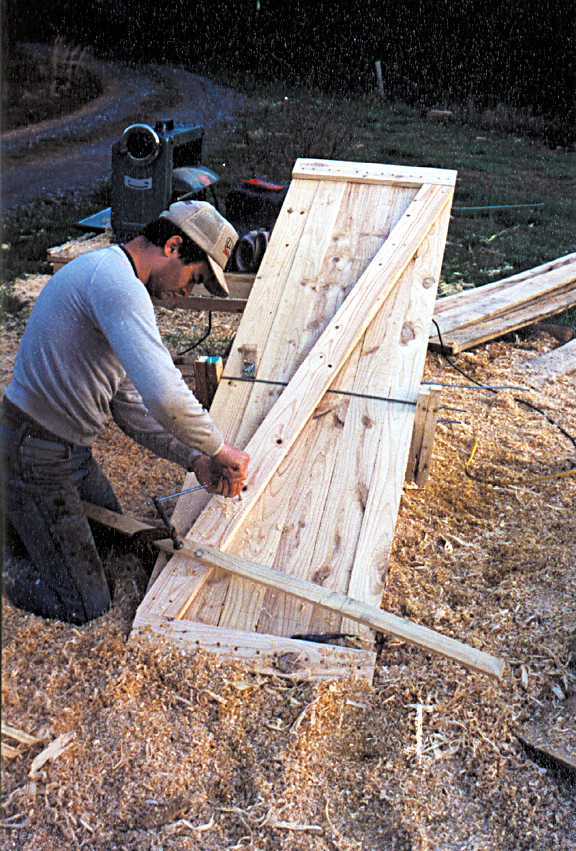
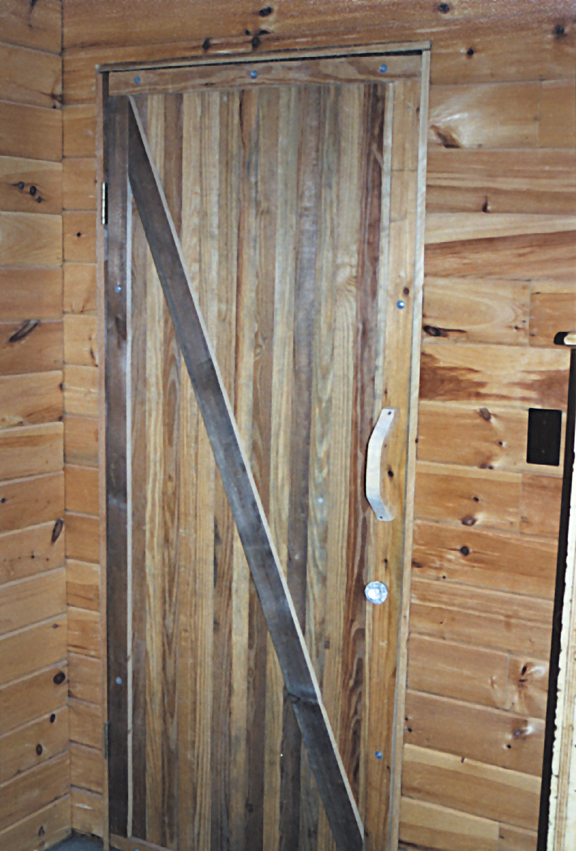
When all boards or timbers are smoothed on all four sides, you are ready to start assembling the door. If you want one of the traditional rustic doors, with an X or Z type of reinforcement, all you need to do is lay the boards on a flat work surface, snug them as tight as you can get them, and make a final visual inspection of the fit. If all seems well, move to the next step.
You can make a quick, cheap, and easy device to hold the boards together. All you need are four short lengths of 2×4, a 36- to 40-inch threaded rod, some washers, and some nuts. Nail two 2×4 pieces together in the following manner. Lay one section on top of the other and align them perfectly. Stand the two pieces on edge and drill a hole through the top section, from edge to edge. That is, with the piece standing on edge, move to the middle of the wood and drill straight down. The hole you drill should be the same size of the threaded rod (or slightly larger). Half-inch threaded rods work well, but you can use slightly smaller ones if you wish.
Nail the other two pieces together as before and drill a hole in the top piece. Position the two nailed-together sections so that the bottom piece fits against the sides of the outside board of the door. Do the same thing on both sides.
Next, run the threaded rod though the hole and across the door and through the other joined sections of wood. Then install a metal washer on each end of the rod and add a nut to each end.
When you tighten the nuts, the wood will be pulled together tighter and tighter until the fit is as good as it’s going to be. At this time, mark and cut another piece of wood (the same thickness as the door or slightly thinner) and lay it across the top of the door. Use nails, screws, or bolts to secure the cross-piece in its proper position.
Do the same at the bottom, after you move your wood and rod assembly to the bottom, and get the best fit possible. Nail, bolt, or screw this cross piece into position.
Lay a third support piece diagonally across the door from top left to bottom right, or vice versa. Mark the piece so that it will, when cut, fit perfectly between the bottom and top cross pieces. Then bolt, screw, or nail the piece in place.
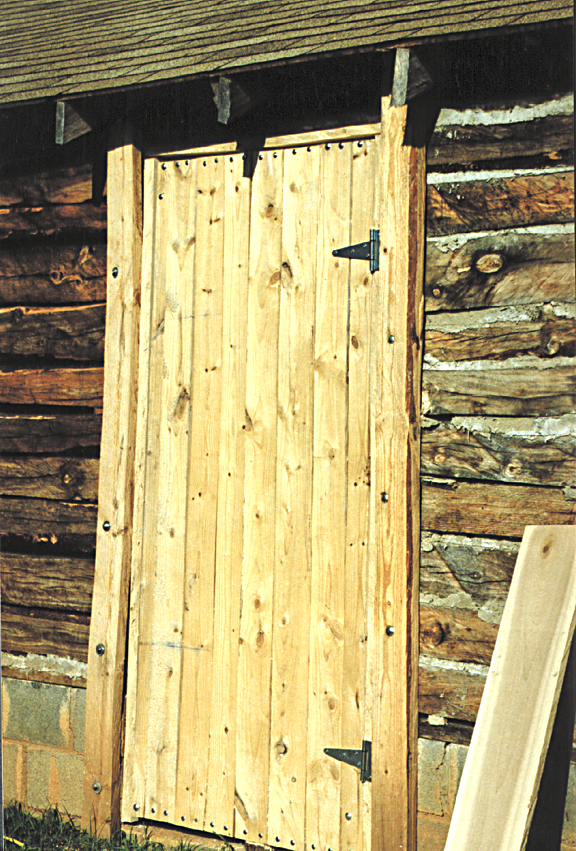
All that remains now is to mount hinges. You can do this by positioning a hinge across the edge of the door and, marking the exact size, use a hammer and chisel and cut out the wood between the marks. Cut to a depth that is the thickness of the hinge. Then use the same procedure on the other hinge. If the door is solid oak, you will need large hinges and three of them, rather than two.
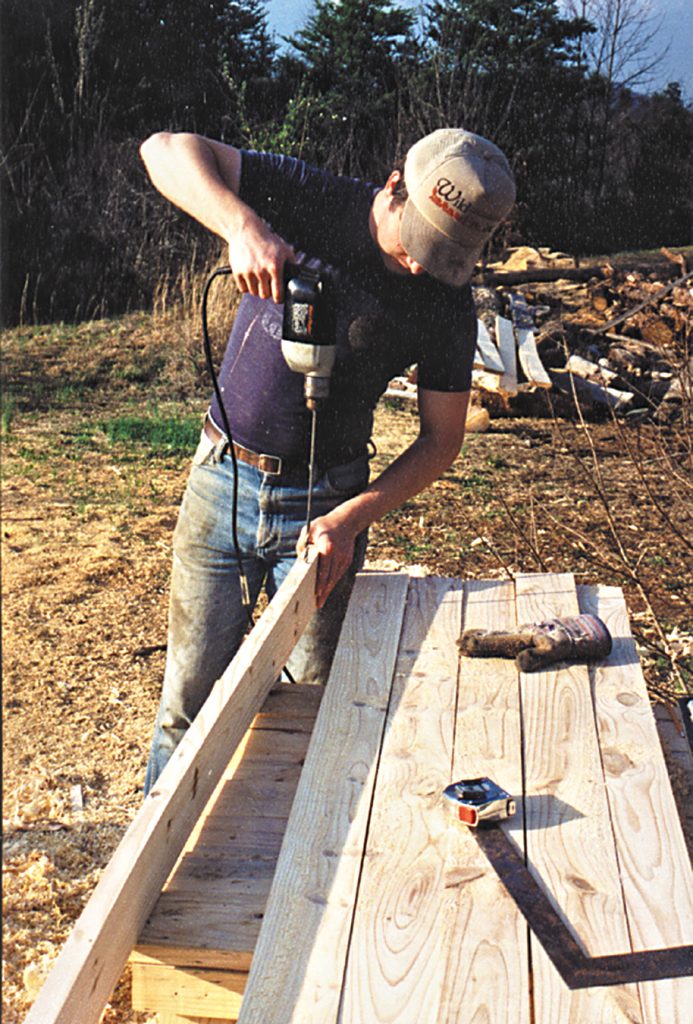
If you want a reinforced door, drill holes through the boards at a point a foot from the top, in the center, and a foot from the bottom. You will not likely find a drill that would ever reach through the entire door, so you must drill one board at a time. There is an easy way to do this.
Lay the first door piece or board on the work surface and use a C-clamp to secure it to the work surface. Be sure to use a piece of wood between the clamp and the door so that you will not mar the door surface. Then step to the side of the board and drill a hole through the board. Start in the center of the edge and keep the drill as level and true as possible so the hole will be exactly the same position on both sides of the board.
When the drill bit reaches through the board, remove the bit and position the second board precisely. Then run the bit through the hole again and into the second board just enough to mark it.
Then clamp the second board down and drill as before. You will need to drill each board three times. When the second board is completed, do the same thing with the third, then the fourth, fifth, and sixth board. When you are finished, you should have holes that are perfectly aligned in all the boards.
Lay the boards in their final position and drill a larger hole (for countersinking) in each of the three holes in the outside boards. The second hole should be large enough to allow you to screw a nut onto the threaded rod.
Determine which side of the door will be mounted against the door frame and on this side drill a hole half an inch deep (you are actually enlarging the existing hole, as you did before, but this time the hole must be large enough to admit a socket).
Now push the rod through the holes. If the fit is too tight, you can start a nut then tap the nut lightly with a small hammer until the rod extends all the way through.
Now turn one nut until the outside or top edge is flush with the end of the rod. Tap the nut until the nut is forced into the hole for countersinking. You should have a space of 1/16 of an inch (or even ⅛ inch) between the nut and rod and the outside edge of the board. Later, you will use wood putty to fill in the space so that the nut and rod are not visible.
Go to the other end and use a socket to tighten the nut until the boards are pulled together tightly. You will have a small amount of the rod sticking out, unless you cut it beforehand. If there is a small amount left, use a hacksaw to cut it.
Repeat this procedure on all three holes and you now have a door that is incredibly strong. It is thick enough to offer great insulation and a degree of soundproofing.
If you want to be sure there are no cracks visible in the door, you can use a shiplap procedure. This means that you cut half an inch off the top half of the top edge of the board on one side and the bottom edge on the other. You do not cut through the entire board. You cut halfway through then cut from the edge into the center of the board, also half an inch. When you are through with the cuts, the top half of one board will lap over the bottom half of the adjacent board.
If you want a hollow core door, you can use a small frame of wood shaped into a door-sized rectangle. Support the frame by adding pieces across the middle or at the one-third, half-way, and two-thirds points. You can also use diagonal reinforcement.
Then you can cut thin boards (half-inch or so) and nail these on both sides of the door. The difference is a door that is much lighter but is not as strong.
If you want to make your own rustic handles, use a piece of wood the same thickness as the door and a foot long. Draw a curved shape (the shape you want your handle to be) and an inner curve exactly like the first one. Cut out the handle so that at the open end of the curve there will be a flat surface for nailing or screwing to the door.
If you want a homespun latch, you can use a small piece of wood with a hole drilled through it large enough to admit a small latch shaft. Attach the piece to the door frame, and do the same for the door itself. Align the two attachments and secure the second one to the door.
Then you can carve a small latch pin and this will serve to lock the door. Actually, you are not locking the door: you are only securing it so it won’t blow open. This kind of latch can be made and assembled in about 15 minutes.
Hang the door as you would any other. You will have a door that will last for ages and will remain attractive in a rustic sense for as long as you keep it maintained with a covering of polyurethane or similar stain.
We use these rustic doors in our house. I have two in my office and one in two of our bedrooms. We do not use regular latches; instead, we fitted the doors so snugly that they are held closed by friction. They have been mounted in this fashion for 10 years now and have never given the slightest bit of trouble.