
By Setanta O’Ceillaigh
It was not my intention to live in such small housing, but necessity is the drive of all creation. I had lived most of my life as one of the rural poor, but then went to work where I was making so much compared to what I did before that it was like winning the lottery. I made some very poor financial choices and was forced to make significant changes to remove the worst elements from my life. I moved back to the countryside and got out of my mortgage and car loan by voluntarily surrendering them to the bank. I bought the best tract of land I could afford out of savings, got a dilapidated camper, and moved onto the lot almost the day the deed was in my hand. I was determined to make it work or die trying.
My summer was spent clearing the lot and getting garden spaces ready for the next year. It was too late in the year to expect to get a garden in, so I focused my attention on clearing the lot, stacking firewood, and saving money towards building a cabin in the fall.
Winter came earlier than I expected, and the camper was not suitable to survive the winter in. I assessed what my resources were and decided it was time to get winter shelter up. I had less than $2000 to work with; it would not be enough to build a house, and the snow was already starting to fall on the coldest days.
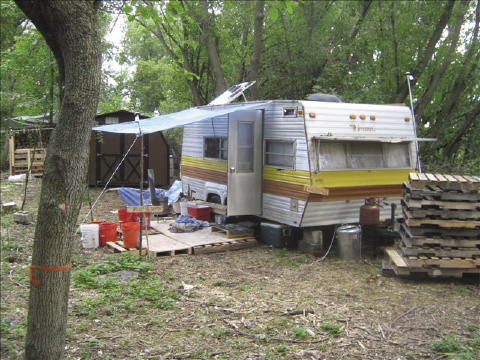
When I first bought the land I had a little extra left over and had bought a small storage shed. The shed was 10 feet wide and 14 feet long, a “low wall” barn-type with the lateral walls less than four feet high, and a barn roof peaking only seven feet off the ground. The shed had double doors and a small window on the opposite side. It was constructed of 2×4 framing, asphalt roofing, plywood, and T1-11 siding, and was built and delivered on 4×4 skids.
Since I voluntarily foreclosed on a mortgage and a car loan, I had destroyed my credit and could not count on loans. Everything I would accomplish on my homestead would need to be earned either by saving up or by building it myself. Through the summer the shed was used for storage and I lived in the camper, but with winter closing in I determined my best option was to live in the shed and use the camper for storage.
The first step in converting the shed to a cabin was to take measurements of all the walls on the inside. I planned to buy the cheapest paneling or plywood and cut it into sheets that I could screw in place quickly and have an exact fit to make the walls smooth. With a list of measurements in hand, I headed into town.
The cheapest wall cover I could find was ¼-inch-thick oak Lauan-type plywood, and the lumberyard selling it was willing to cut it to size at no cost. I also purchased enough rolls of cheap R13 fiberglass to fill all the spaces between the wall studs (R11 and R13 fiberglass has a thickness of four inches).
The wood stove
I had cut as much as 30 cords of firewood over the summer, clearing and cleaning up the lot, so I had a lot of fuel to count on for winter. However, I did not have a stove yet. The camper was not big enough to safely set up a wood stove and the shed was a little small as well, but it was more suited to the task. For safety I bought enough cinder blocks to build a heavy heat shield to insulate the walls from a stove, and I bought flat blocks to line the floor.
I had been looking for a used stove most of the summer, but everything I found was either too large or was not in serviceable condition. Despite my reluctance to buy new, I ended up buying a new cast iron “log wood” stove. It was the cheapest I could find and was much more than I needed. I would later scale down to a “boxwood” stove (a smaller version of the same design) when I found one.
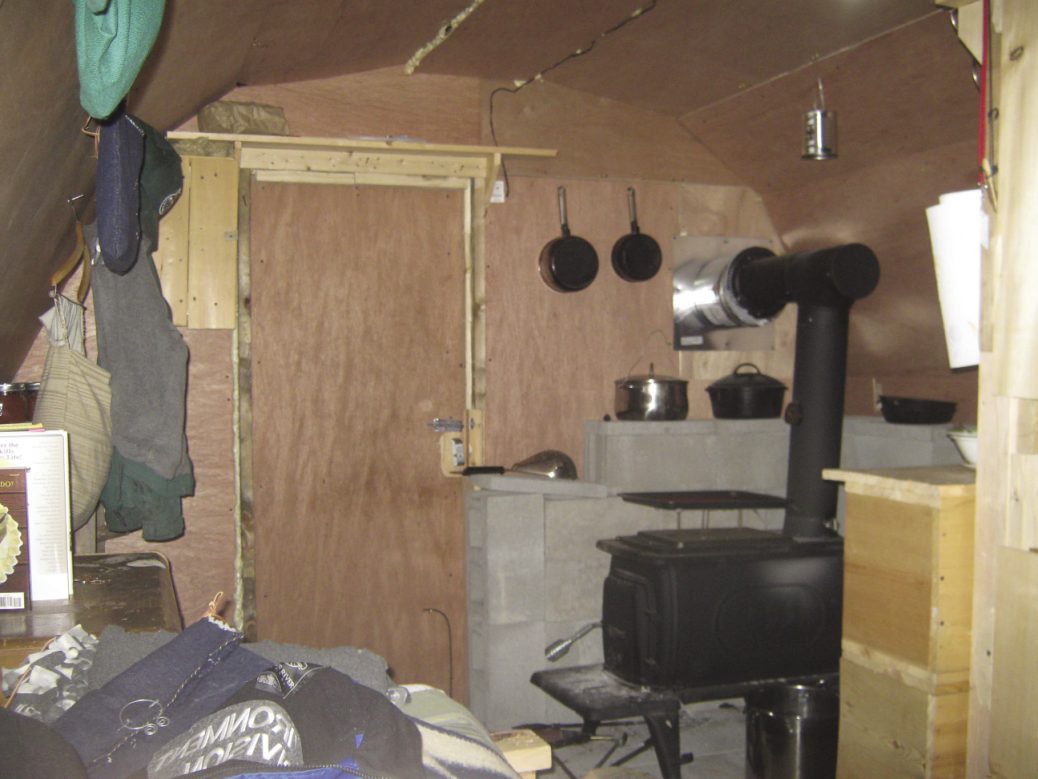
After all the other supplies were purchased, I found I could not afford an insulated chimney. Since I had no backup shelter planned, I decided to modify the old “through the window” method. I purchased several “T” connections and a lot of six-inch single-wall stove pipe, then I picked up a short 2-foot section of 8-inch insulated chimney and a wall thimble.
To outfit the shed as a cabin, I moved everything into the camper. I then cut the fiberglass to size and filled it into all the spaces of the wall and screwed the Lauan paneling to the wall studs to cover everything. The chimney and dealing with the double doors was the most interesting challenge. I resolved to modify the double-door into a single door. To do this I nailed the second door in place and used scraps of 2×4 to raise it to the same thickness as the surrounding wall. I cut a section out of the door and side wall out and framed it in to support the chimney thimble. I then filled the door and wall with fiberglass and covered it with Lauan. From the interior it looks like a single wall as if the door never existed; from the outside it still looks like a double-door.
I lined the inside corner with cinder blocks as a heat sink, and set up the stove. The stove pipe ran up and through the 2-foot chimney section, then it was supported on the outside with a crude base of cinder blocks. I broke up pieces of stove brick and packed it into the gap between the single wall pipe and the chimney heat shield. This was to cut back on drafts.
The doors had been made from T1-11 siding and 2x4s. To insulate the remaining door, I screwed Lauan to it and left the top unsecured. I broke up Styrofoam packaging that my solar panels were shipped in, packed the pieces into the door through the unsecured top, and screwed the top in place.
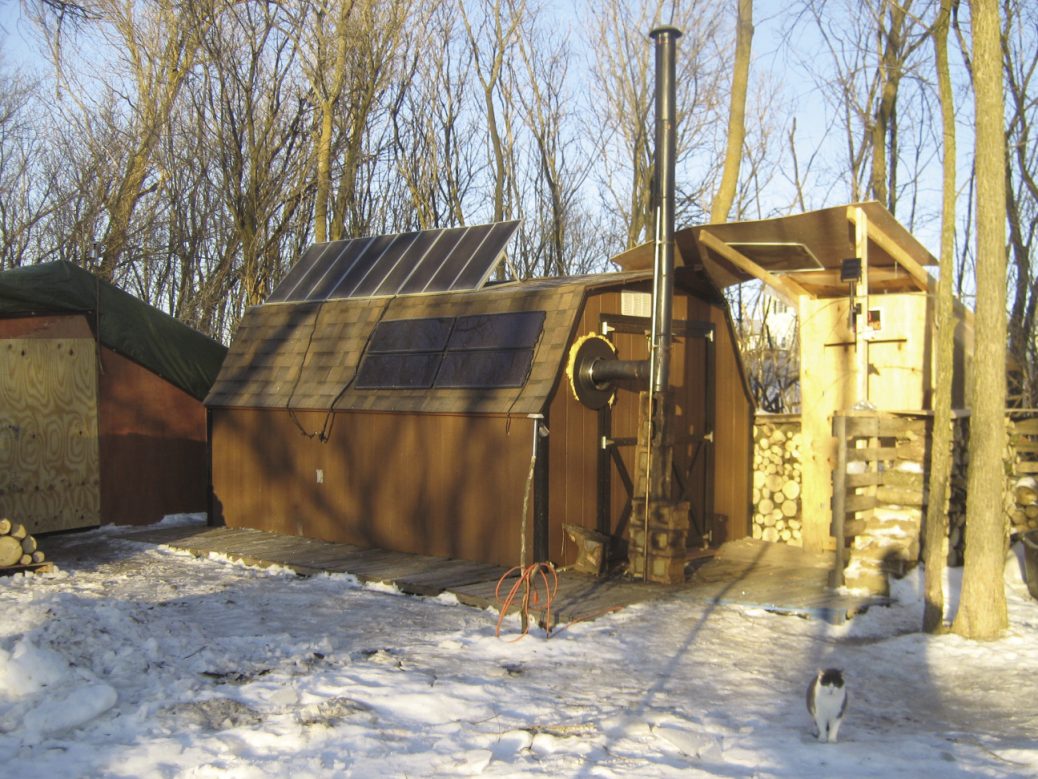
Solar array
Before converting the shed to a cabin, I had already set up my solar array on it. I had initially bought four individual 15-watt solar panels, buying them one at a time as I could afford them. I had also purchased three of Harbor Freight’s 45-watt kits. They were on sale for $100 a set. I had mounted them to the roof and wired them together to act as a single large panel generating up to 195 watts per hour. I set them up on the shed as a charging station. When I moved into the shed I just used the battery where it was by setting up a 6-outlet surge protector plugged into a 200-watt inverter that was clipped onto the battery. The panels charged the battery and I only had to hit a toggle switch to turn the power on. The kits came with a few 5-watt DC lights that I wired directly to the battery and set toggle switches on for convenience. I improved the DC lights by adding reflectors. The reflectors were just the metal heat shields salvaged from under the burners of a kitchen stove someone was throwing away.
At this point the shed was heated, insulated, and had power. The interior was too small for conventional furniture, and I didn’t have any to begin with since I was using the fixed furniture in the camper. I used a bunch of scraps salvaged from leftover lumber and broken up shipping pallets to create fixed furniture. I started by building a divider wall to cordon off one quarter of the shed. This was to be a closet. The wall consisted of recessed shelving. I made a 3-foot tall shelf that I positioned against the wall and close to the stove. This allowed me a kitchen counter, and I put hooks and nails everywhere to hang utensils on. I kept my main cast iron cookware on top of the cinder block heat shield.
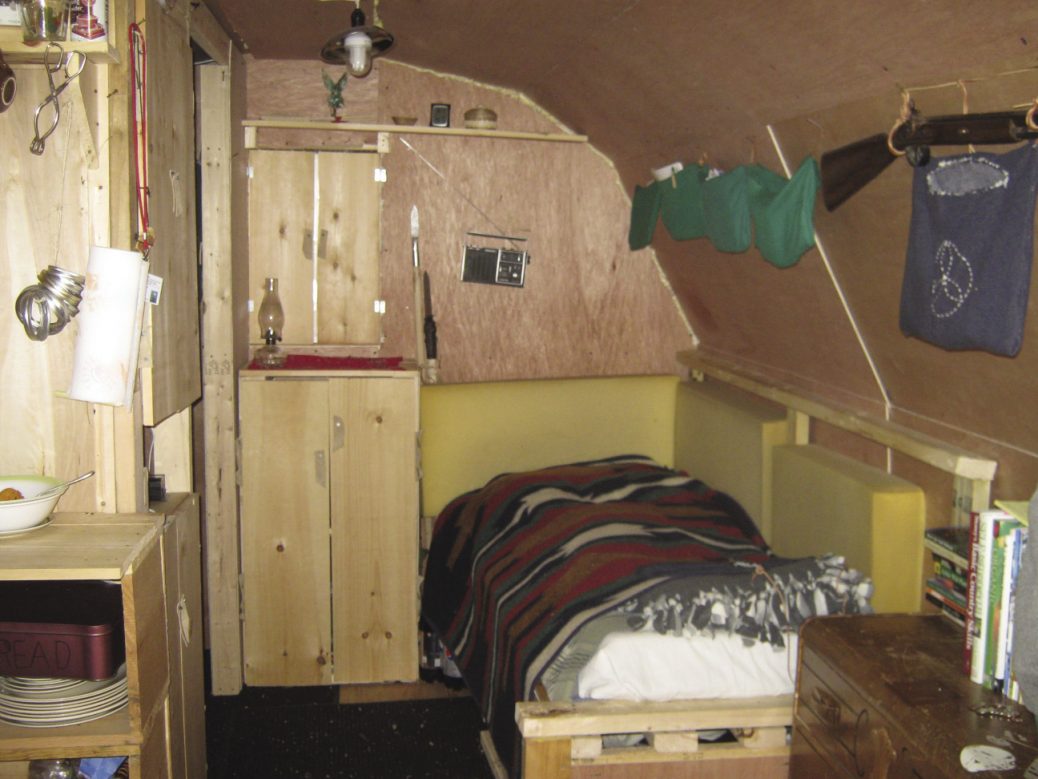
I built a platform against one wall and used the cushions from the trailer to make a mattress. This platform became a combination couch and bed. I positioned a smaller shelf under the window. I could run my laptop and use the shelf as a table for it. I built a rack for firewood next to the door and put a table on top of it as well. Any place I could add a shelf I built a shelf, since I was hard pressed for space and needed to make the most of every inch. I further improved on some shelving by converting them into cabinets. I did this by cutting strips of leather to make hinges and screwing on leather tabs as handles.
To improve efficiency, I packed rocks under the edge of the cabin from the outside and filled the gaps using three cans of expanding foam gap filler. This skirted the cabin nicely. The outhouse was just outside the door and housed a bucket type sawdust toilet.
It took less than a week to rig up the shed into a cabin, and this was in addition to working full-time. The cabin was cramped but livable. The stove frequently overheated the cabin, so most nights I had to leave the door open to keep it under 105 degrees inside. That first winter I used about four face cords of firewood for heat. I scaled down to a smaller stove when I found one, and it was more suited to the small space. Leaving the door open all night eventually lead to a feral cat moving in and learning to tolerate me.
It was not what I intended to live in when I moved onto the lot, but I worked with what I had available and made the most of everything. I ended up living in this cabin for about 14 months before I moved into a slightly larger one. The bigger one still wasn’t what I wanted, but it would be a huge improvement by comparison.
Next issue — Part 2: Moving up to a storage barn.
Very Impressive … I admire your creativity and perseverance!
May God Continue To Bless You Going Forward…
Peace,
Al
:-)