
")
By Steven Gregersen
Dismount and mount your own tires
When I was 16, I landed my first “real” job at a service station. Back then, gasoline was 25 cents a gallon and the attendant filled your tank and cleaned your windows. We’d also change the oil in your vehicle and repair flat tires. We used a bubble balancer to balance the tires, and a manual tire machine. Steel belted, radial tires were new to America. Times have sure changed!
Most of my adult life I worked as a mechanic and always had access to tire machines. Eventually that too, changed. Now I was the customer paying someone else to put my studded snow tires on in the fall then take them off again the next spring. With three vehicles, the twice-yearly routine got kind of expensive so I began looking at other options. What I found was a manual tire machine very similar to the one I’d begun with way back in the ‘60s. It was easy to use and the price was low enough that it would pay for itself the first time I put it to use.

Photo 1
Years ago, I purchased my tire machine directly from a Harbor Freight Tool outlet in Wisconsin for $39.99, but they’re available from other outlets too. Northern Tool & Equipment has a similar model listed at $99.00 plus shipping. Its measurements are slightly larger than mine and they advertise theirs as “heavy duty.” If it is, it would be a bargain at that price. I also did a quick search on eBay for “manual tire changer” and found models like mine listed from $59.99 and up.
Note: Despite the claims of some sellers, these machines are not mobile. They need to be firmly anchored in concrete or some other substantial base.
So, if you’re the do-it-yourself type and want to save some money here are step-by-step instructions for using the machine pictured above.
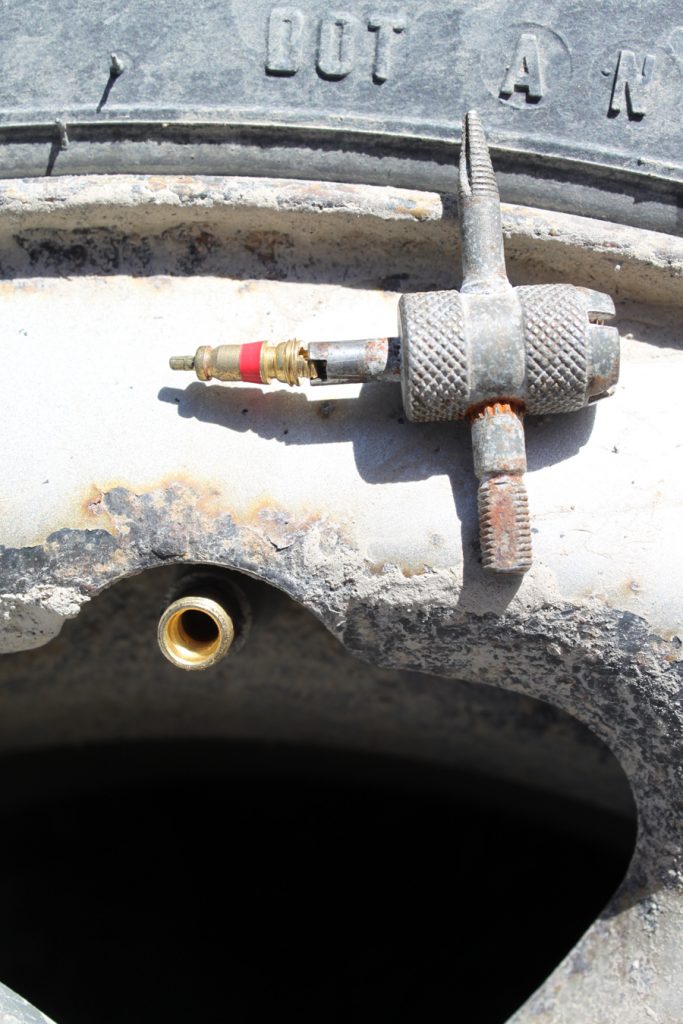
Photo 2
The first thing you’ll want to do is remove the valve core. This does two things: it deflates the tire and it allows the air to escape when you’re breaking the bead loose in the next step. The tire valve stem core removal tool shown is available in most discount stores or any automotive parts store.
If you are going to put the same tire back on the same rim, you’ll want to mark the tire at the valve stem so that when you put it back on the balance won’t change. Otherwise the tire will need to be rebalanced. It’s also a good idea to mark the location of the wheel weights on the rim in case they get moved while dismounting or mounting the tire. You can use a permanent marker or purchase a tire “crayon” at the local parts store.
Photo 3
Position the tire on the base of the machine as shown. It doesn’t matter which side you begin with since you’ll have to do both. Put the curved bar on the tire as close to the rim as possible and apply downward pressure. If the bead (the part of the tire that seals against the rim) is stuck, you may have to work it down slowly by rotating the tire a few inches then re-applying pressure to the bead. Be sure that you’ve removed the valve core. If you haven’t, the air pressure inside the tire will keep the bead from breaking loose.

Photo 4
When you’ve pushed it down far enough, you’ll hear a “whoosh” of escaping air as the bead breaks free. It should look like the photo above. Be sure it’s loose all the way around the rim. Turn the tire over and repeat the process for the other side.
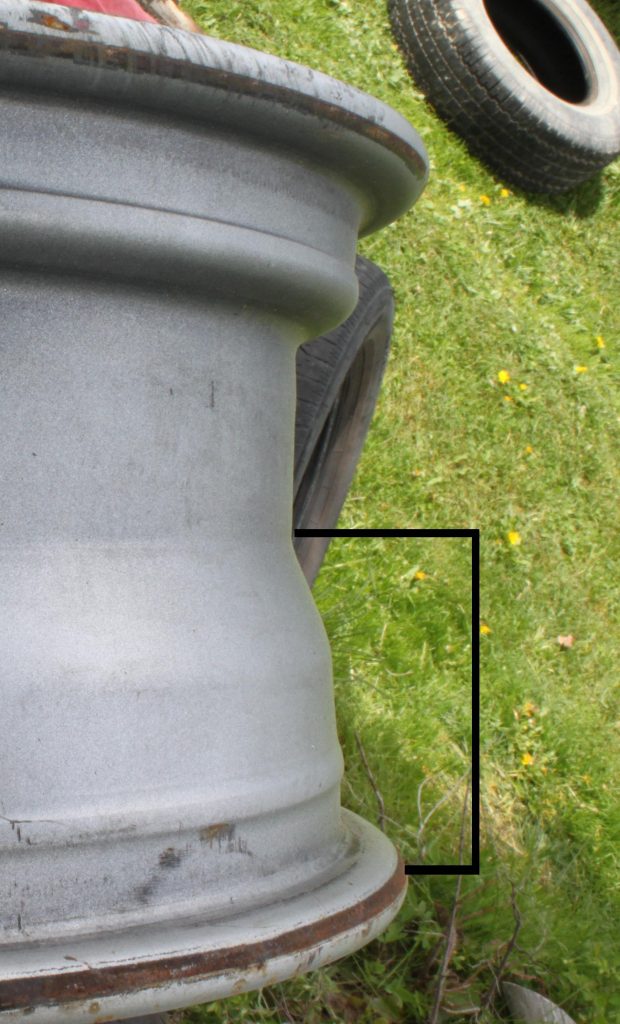
Photo 5
Note the different shape of the rim inside the bracketed area. This side must go down on the machine and the valve stem must be up in order to remove the tire from the rim.

Photo 6
Set the rim on the plate, install the hold-down, and screw on the upper shield to hold it all together. Be sure the vertical pin is through one of the holes for the wheel studs. It holds the rim stationary during the next step. If you’re putting a different tire on the rim, now is a good time to remove the balance weights from the rim. Pry them loose with a screwdriver.
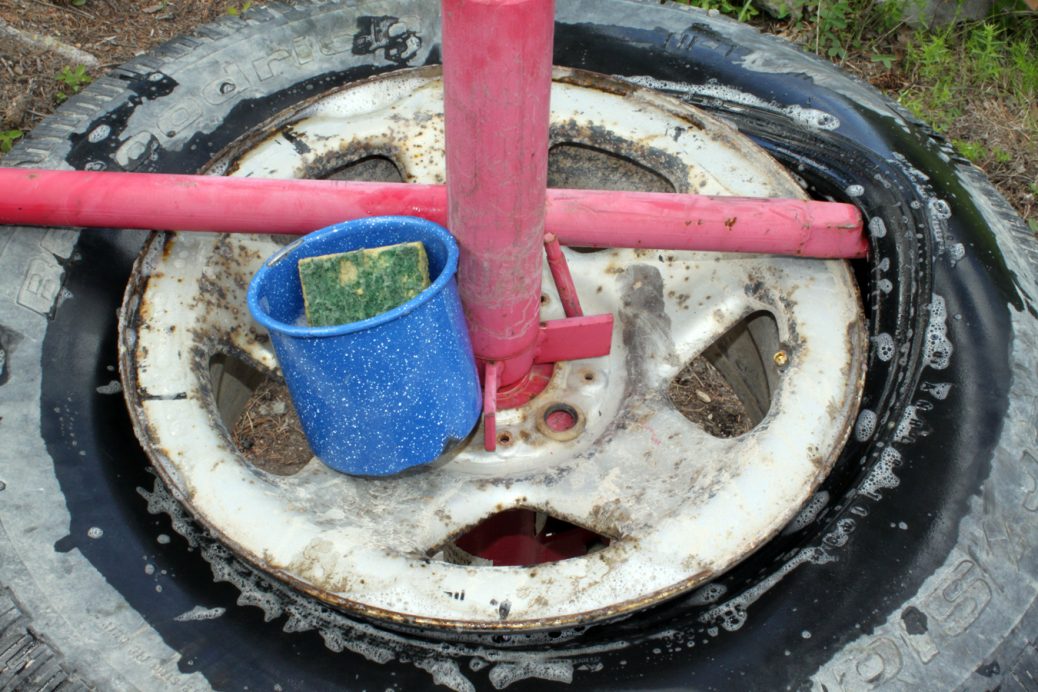
Photo 7
Mix up some dishwashing soap with water (50/50 ratio) and apply it liberally to the rim and bead area to provide lubrication for rolling the bead over the edge of the rim. It makes the next step much easier. Once you’ve lubricated the bead and rim, push down on one side of the tire to get the bead positioned in the narrow portion of the rim (see photos 5 and 17) and slide the flat end of the tire iron under the bead on the opposite side of your hand. Now pry the bead over the rim as shown.
Photo 8
Use the center shaft on the tire machine as a pivot and walk the bar around the tire like you’re on a merry-go-round. The tool will roll the bead over the edge of the rim.

Photo 9
That was the easy side. Now you need to get the lower bead up and over the top of the rim. Instead of pushing down on the tire, you’ll need to lift up on it to position the lower bead in the narrow part of the rim. Reach around with the bar and insert the flat end between the tire and rim like you did on the upper bead. It’s a little more difficult because the upper bead will be in the way. Lever the lower bead over the rim like you did previously. The photo shows what it should look like from the bottom looking up.

Photo 10
Walk the tool around the rim just like you did the first time. For best results, keep the bar as near horizontal as you can.

Photo 11
Now that you’ve removed the tire, take a wire brush and clean up the bead area on the rim. If you skip this step, you may have difficulty getting the bead to seal against the rim.

Photo 12
Liberally apply soapy water to the rim around the bead areas. This makes it easier to remount the tire to the rim and for the bead to seat when you apply air.

Photo 13
Put the tire back on by pushing the tire on the rim as shown in the photo. A 45-degree angle works best for me.

Photo 14
Note the shape of the tire tool. The “hook” portion fits over the lip of the rim. The tapered part goes against the tire’s bead. Lube this up with soapy water before using it.

Photo 15
This part is a little tricky. You’ll need to put the hook over the rim then position the tire’s bead on the tapered part as shown in the photo. Now pivot the bar around the center post to roll the lower bead over the rim. As the bead is rolled over the edge, you’ll have to keep pushing it down into the narrow portion of the rim just as you did when removing the tire.

Photo 16
This is how it will look when you do the upper bead. Note that I’m pushing down on the tire after the bead is rolled over the rim. Keep pushing the bead down as you work your way around the tire. If you don’t, the tool will bind up and stop moving. The tire’s bead must be pushed down into the narrow portion of the rim in order to have enough clearance to roll the bead onto the rim. See photo 17 for more detail.

Photo 17

Photos 18

Photo 19
Sometimes the hook end of the tool will slip off the rim or bead before you make a complete circle. If that happens just insert the flat end of the bar between the bead and the rim and pry the bead over the edge of the rim as shown in photos 18 and 19.
Now that the tire is back on the rim, the next step is to push down on the tire and twist it like you’re screwing a lid onto a can. This should seat the lower bead against the rim to seal off air leaks there. Once the lower bead is stuck, lift gently around the outside of the tire and apply air to the valve stem. It works best if you leave the valve core out for this step because you want as much air flow as you can get. You should hear the tire seal and begin to inflate. Remember, if you are remounting the same tire to the rim be sure to align the mark on the tire with the valve stem before you pump it full of air.
CAUTION: KEEP YOUR HANDS, FEET, EARS, TOES, CATS, DOGS, CLOTHING, TOOLS, AND EVERYTHING ELSE AWAY FROM THE BEAD PORTION OF THE RIM AND TIRE. When the bead seats it does so with considerable force. It will crush anything in the way. If it’s your finger it will hurt… a lot! It could possibly have you locked to the rim more effectively than a steel trap. Be careful!
Once the bead has sealed (no air leaking past the bead) and the tire begins to inflate, install the valve core and check the tire pressure as you fill it with air. Once you’ve reached maximum pressure, check to see that the bead has fully seated by carefully inspecting the bead area. All tires have a ridge of some kind around the outside of the bead. The space between this ridge and the edge of the rim should be equal all the way around the tire. If it isn’t, deflate the tire, apply more soapy water around the bead area, and re-inflate the tire.
If you’re having problems getting the bead to seal using just an air hose, here’s a trick I read about it in Popular Mechanics magazine (http://www.popularmechanics.com/cars/how-to/repair/4337825?click=main_sr). Spray a two-second burst of carburetor cleaner into the tire, light a match, and throw it into the tire. Do not hold the match in your hand anywhere near the bead. The result will literally blow the beads onto the rim. Now you can finish the process with an air hose. Leave the valve core out when you try this. I’ve never done it so I can’t speak from experience. I’m not accepting responsibility for pinched body parts or singed hair!
Be sure you use the proper tire and rim combination. Don’t ever try to mount a tire to a rim that’s a different size. Most of the time that will be obvious, as when trying to mount a 15-inch tire to a 14-inch rim or vice-versa. However, a 16.5 tire will fit on a 16-inch rim but the results are disastrous when you pump air into it. Again, be careful.
Once you have the bead seated properly and the air at the correct pressure, re-install the tire on the vehicle and take it out for a test drive. We don’t balance new tires unless they vibrate or shimmy at highway speeds. Modern manufacturing methods for both tires and wheels is much better than in years past. In our experience, balancing isn’t needed about half the time but when we’ve needed to, it’s still cheaper to have our tires balanced after we put them on than to have a tire shop mount and balance them.
Aside from the seasonal tire changes, there are other good reasons for mounting and dismounting your own tires. We’ve purchased tires online because we sometimes find them at half the price local stores charge. However, these stores will not mount tires you’ve purchased elsewhere (can’t really blame them for that!) so we save money not only on the purchase price of the tires (more than $200 in one instance) but also on what the tire stores would charge for mounting the tires. We’ve also purchased used tires at yard sales and mounted them ourselves.
In another instance, our son had two flat tires on a Sunday. The tires were ruined so we mounted two of our “reserve” tires on his rims so he could get to work Monday morning. We would have had to take his rims 20 miles to the nearest tire store Monday in addition to driving him to work and picking him up later if we hadn’t had our own tire machine. We saved not only gasoline, but driving time and 70 extra miles on our vehicle.
If you use patches instead of plugs to repair leaks, you’ll need the ability to remove and re-install your tires to the rims and, short of spending thousands for a pneumatic tire machine, a manual tire changer will do the job nicely.
Manual tire machines are inexpensive and easy to use. The only harmful side effect that I know of is the limp you develop from carrying the extra weight of the cash you didn’t spend at the tire store.
Patch a tubeless tire

Photo 1
Tubeless tires are easy to patch once you have the tire off the rim. First, find and mark the hole.

Photo 2
Remove the nail, screw, or whatever punctured the tire if it’s still there.

Photo 3
Use an electric drill with a wire brush if you have one or an abrasive like coarse sandpaper to rough up the area around the hole. Note that I inserted a short board between the tire’s beads to give me more room to work.

Photo 4
Apply a thin coating of rubber cement over and around the hole and let it dry. It must extend beyond the area covered by the patch.

Photo 5
Remove the plastic backing from the patch.

Photo 6
Put the patch over the hole.

Photo 7
Use something to press the patch down tight on the tire. I use a golf ball and roll it back and forth over the patch while pushing down hard. I’ve also used the handle end of a screwdriver. You can buy a tool designed for this at your local parts store. It looks like a thick pizza cutter with a wide, file-shaped edge.
Remount the tire to the rim and check it for leaks. If there are no leaks, you’re done! Tubeless tire patches and patch cement can be purchased at any auto parts store. Do not use patches designed only for inner tubes to repair tubeless tires. They won’t hold! I have, however, used patches designed for tubeless tires on inner tubes and they worked fine.
Patching your own tires is easy. It saves you money and time and you get a real feeling of satisfaction and independence by doing it yourself.
Another trick to help seat the tire back on the rim is to use a rope or ratcheting strap around the tread of the tire causing the tire to bulge.
Also, having a larger air tank with more air volume helps seat the bead back on.