

By Charles Sanders
Emergencies happen. Whether you are camping, hunting, fishing, hiking, boating, or just traveling, there may come the time when you are thrust into a real survival situation. As a self-reliant type of person, you probably realize that there are times when we can not depend upon getting help exactly when we need it and must rely upon our own wits and skill.
As a part of the Survival Basics program that I present occasionally, I stress the importance of remembering the Rule of Threes. Generally speaking, an average human can survive:
3 minutes without air
3 hours without shelter
3 days without water
3 weeks without food
3 months without companionship
In a survival situation, you have roughly three hours to find shelter. While this depends upon your location, your activity, the weather, and other factors, it is a good rule of thumb. If you’re hiking, lost, or stranded and the sun is about to set, you want to make sure you have a good shelter to protect you from the cold. Even in warm weather, the nights can get cool and a windbreak or other shelter is very helpful. If you are sweaty or wet, heat loss will be compounded.

Make your shelter just large enough to accommodate you and not much else. This is important, especially in cold climates, because your body heat may well have to heat it. Be extremely careful if you are going to use fire to heat the shelter, as most natural shelter materials are flammable. If you are hiking in a desert, you’ll want a shelter to provide shade. Most of the time, though, you’ll be trying to keep warm. Use everything you can think of for insulation. Crawling inside a big pile of leaves or pine needles is actually pretty warm and comfortable (do not attempt this near a fire). The more, the better, as your goal is to create as much dead air space as you can to help insulate you from the cold and help reduce heat loss. A large pile of fresh pine sprigs is not only a springy mattress, but is good insulation from the ground. Again, the goal is to provide insulation. In this case, from the cold or damp ground.
If you have access to any lumber, limbs, poles, or the like, a simple wooden framework can be covered with a tarp, boughs and limbs, and even snow to provide protection from the wind and elements, as well as to help retain body heat.
Remember, shelter can include tents, tarps, old buildings, or automobiles. Even clothing is a type of shelter. Crawl in under a root wad, a rock ledge (check for snakes), or old shed. Let’s look at several other types of shelter that can be carried, worn, improvised, or otherwise created.
Clothing: This topic alone could fill the pages of a book. Suffice it to say that you should dress for the location, activity and expected weather conditions that you might encounter. Remember to dress in layers so that you don’t overheat. You can add or remove clothing as your activity and the temperature warrants.
Poncho: The poncho is a fairly familiar type of shelter. They come in a wide variety of materials, sizes, and colors. From the inexpensive plastic ponchos found in the big stores, to those of lightweight rip-stop nylon, you should be able to find one that suits you. In my view, one of the best is the military style poncho. It is of ample size, has a drawstring hood, and has grommets and snaps around its edges. The grommets aid in securing it with lines when used as a shelter. The snaps allow two of them to be put together to make a larger shelter.

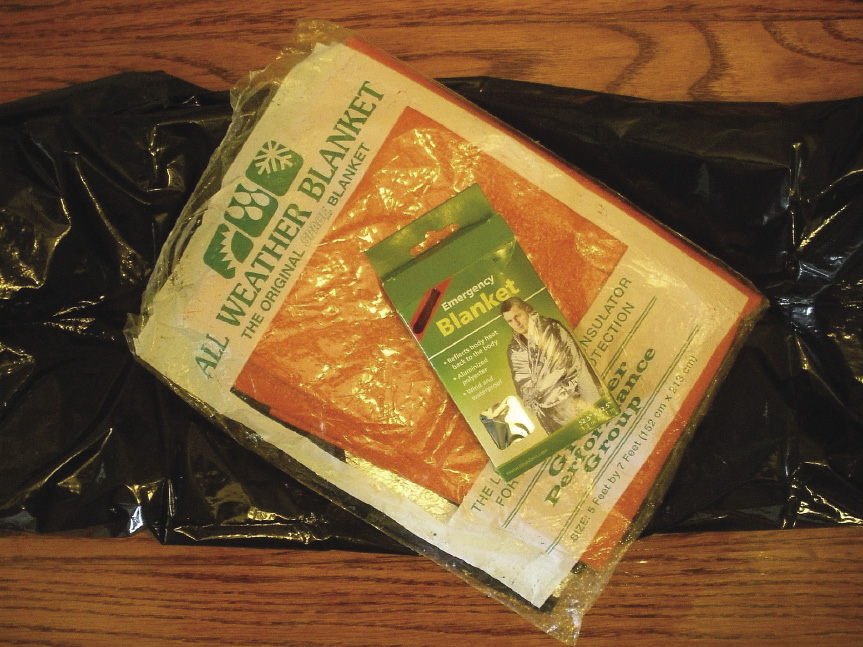
Space Blanket: The original Space Blanket® is a quality item. It is durable and offers a shiny, heat-reflective silver side with highly visible international orange on the other. It can be fashioned into a lean-to, a pup-tent-type of shelter, or simply used as a wrap to roll up in to retain body heat. It is hemmed and has grommets along its edge to aid in securing it as a shelter. I definitely recommend one of these for your kit. They cost around $20.
Mylar blanket: These inexpensive sheets are very handy to have in your G.O.O.D. (Get out of Dodge) bag or other carrier. They are not much larger than a deck of playing cards and offer some protection from rain as well as providing some reflection of body heat. They can be found at just about any store that carries camping supplies and run only a couple of dollars apiece, making it easy to have several on hand.
Wool blanket: I still prefer wool as one of the best providers of warmth in a blanket, clothing, or covering. Wool is a natural fiber that can help keep you warm even when it’s wet. Keep a surplus wool Army blanket or two stashed in a trash bag in the trunk of your vehicle.
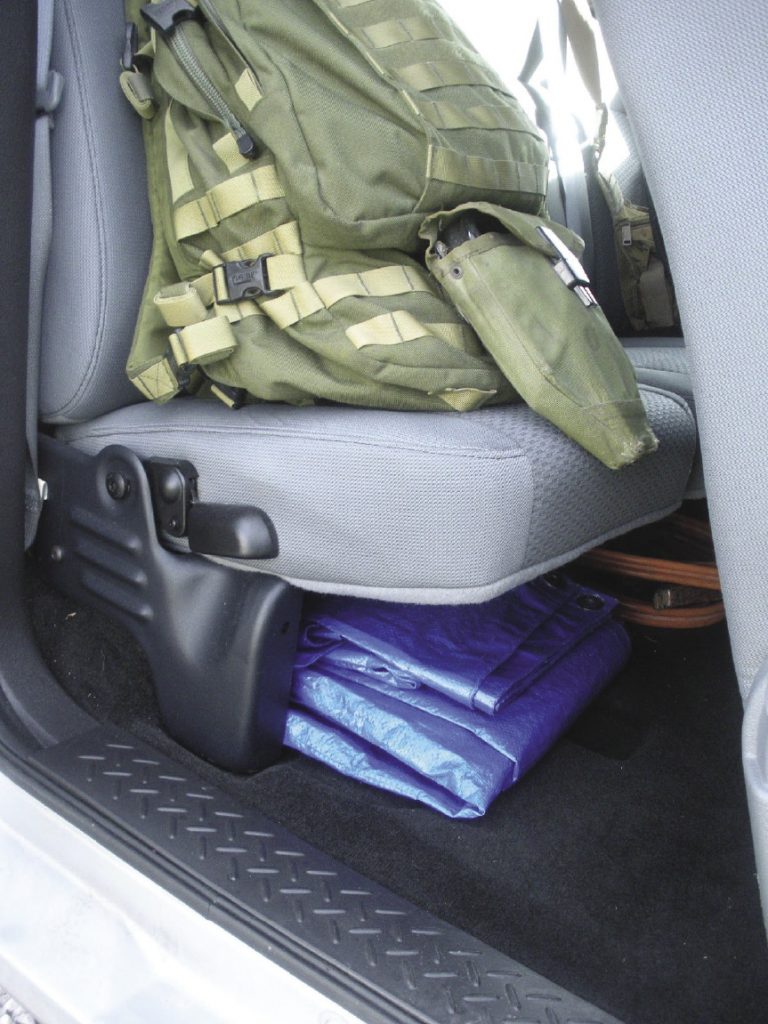
Contractor garbage bag: These durable bags are simply made of heavier weight plastic and are much larger than those we use in the house. They can be used in a variety of ways including making an emergency poncho. Years ago, while fighting wildfires in the rugged mountains of Idaho, I had the occasion to utilize one of the heavy 50-gallon bags as an improvised rain poncho when a storm descended upon us. Yes, it does rain, even while fighting wildfires! By cutting a face-sized hole in one corner of the bag, it worked well and kept me and my gear dry. They don’t take up much space, and one for each person in your party can easily be stashed in your pack.
Jungle Hammock: The venerable military jungle hammock deserves consideration as an emergency shelter. One of my uncles, who was also my wildcrafting mentor, once spent a summer living in a remote river camp where his only shelter was a jungle hammock. It served the purpose, but at summer’s end, he did order a canvas wall tent for the next season.
The old jungle hammock is another piece of gear where we are seeing the old becoming new again. There is increased popularity among some hikers and campers of using hammocks instead of tents or other shelters. These trendy, new hammocks are made of lightweight nylon fabrics and weigh only ounces. They can fit into a pint-sized stuff sack with no problem.
Lean-to shelters: There are as many different types of lean-tos as there are people making them. Every situation has different challenges and conditions, and each offers different materials to use in constructing a shelter. Always remember to do the best you can, with what you have, where you are.
A lean-to can be constructed by draping a piece of plastic over a sapling or tree that you have cut nearly down. A cut pole can be lashed between a couple of trees and evergreen boughs can be laid, in shingle fashion, to help create a roof of sorts. Be sure to start at the bottom and work upward with the tips of the boughs pointing downward. This will help direct any moisture down and away from the occupant.
Debris shelters: By debris shelter, I am referring to using leafy or vegetative debris commonly found in the woodlands. In a survival situation, these shelters can provide that slim margin needed. I have not used them much and must rely on mostly anecdotal accounts regarding their effectiveness. I realize and appreciate that a huge pile of leaves can help to retain body heat and would not hesitate to crawl into a big leaf pile if need be. Similarly, a shelter made by piling leaves atop a toppled evergreen or similar form could also serve as a survival shelter. While it could definitely protect a person from falling snow, I would not count on it being very effective in the event of rain.
Regardless of the type of shelter you construct, it’s a good idea to add as thick a layer of leaves as you possible can. They will go a long way in insulating you from the cold or wet ground.
Snow caves: Other than making the rare igloo in the front yard for the kids, I must admit that I have no experience in constructing or using a real snow cave. We just don’t usually get that kind of snow here in Southern Indiana. I have studied them somewhat though and believe that they are effective when constructed properly, preferably with a mounded up sleeping bench to keep you up and out of contact with any melting snow. In addition, the snow cave should have a ventilation hole to allow for some movement of air. As with other types of shelters, the key is to get out of the wind and minimize heat loss.
What a Great article!
Also, good timing!
Thanks always looking for new or different ideas to refresh my mind.