
By Jackie Clay-Atkinson
Of all the different fruits and vegetables we grow on our homestead, beans are without a doubt the most versatile and easy to grow. We especially love the huge variety available. We grow around 25 types of beans each year of all of different varieties, colors, and tastes. That’s right: tastes. I’ll bet you thought all beans taste the same, but it’s not so. Some beans are meaty, others are meltingly tender. Many are sweet where others are savory. Quite a few can be used fresh, as snap beans, then allowed to dry on the vine and excel as soup and baking beans. Others are only used as either snap beans or dry beans.
And to top it off, these tasty legumes are good for you! Just look at the statistics.
Dry beans are a good source of plant-based protein. Beans contain between 21 and 25% protein by weight, which is much higher than other sources of vegetable protein. Eating beans regularly is extremely important worldwide as they provide protein at a low cost compared to animal protein sources like beef, pork, and chicken.
Most beans are good sources of potassium, a mineral that promotes healthy blood pressure levels. Beans are also excellent sources of copper, phosphorus, manganese, and magnesium — nutrients that many Americans don’t get enough of. Most types of dry beans are rich sources of iron, which makes them important for vegetarians and vegans who do not get an animal source of iron. Dry beans are an excellent source of the water-soluble vitamins thiamin and folic acid and a good source of riboflavin and vitamin B6.
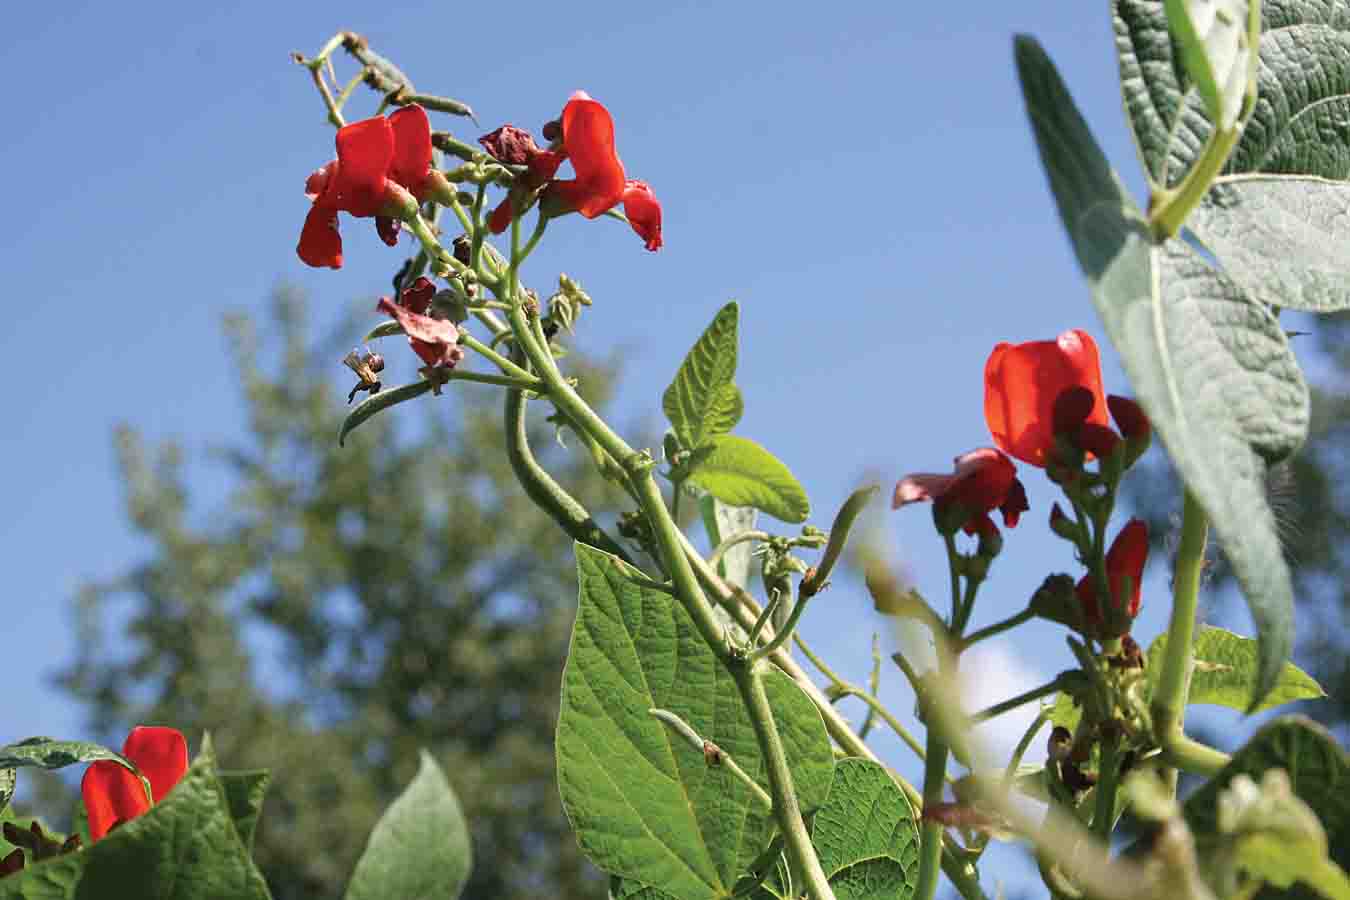
Scarlet Runner — beautiful blooms and tasty beans!
Dry beans are rich in both soluble and insoluble fibers. Soluble fiber traps dietary cholesterol inside the digestive tract. The cholesterol is then excreted versus being absorbed, which helps to lower blood levels of LDL cholesterol, especially if LDL cholesterol levels were high to begin with. Dry beans also provide substantial amounts of insoluble fiber, which help attract water to the stool and keeps you regular. This may help to combat constipation, colon cancer, and other digestive health conditions.
Being rich in complex carbohydrates, as well as a good source of protein, beans have a low glycemic index. This makes them an ideal food for the management of insulin resistance and diabetes.
Oh, did I mention how good beans taste, too? I can’t count the recipes in which I use my beans, from soups to main courses, side dishes to flour. (Yup, you can grind them.) Beans are exceedingly versatile. Let’s take a look at some common and uncommon beans you might enjoy growing and using on your homestead.
Snap beans
Snap beans (Phaseolus vulgaris) are beans which are harvested in their immature state. They have small seeds developing in the pods and are often eaten fresh, or frozen, dehydrated, and canned for long-term storage. They are often called “string beans” as many old-fashioned beans have tough “strings” which grow along the side of the pod and must be removed by pulling them down like a zipper before snapping into bite-sized pieces to eat. Many heirloom beans and most modern beans do not have strings while they are at the snap bean stage. This makes them quicker and easier to get ready for the table or processing. Many old-timers swear string-less beans just don’t taste as good, but we love them all!
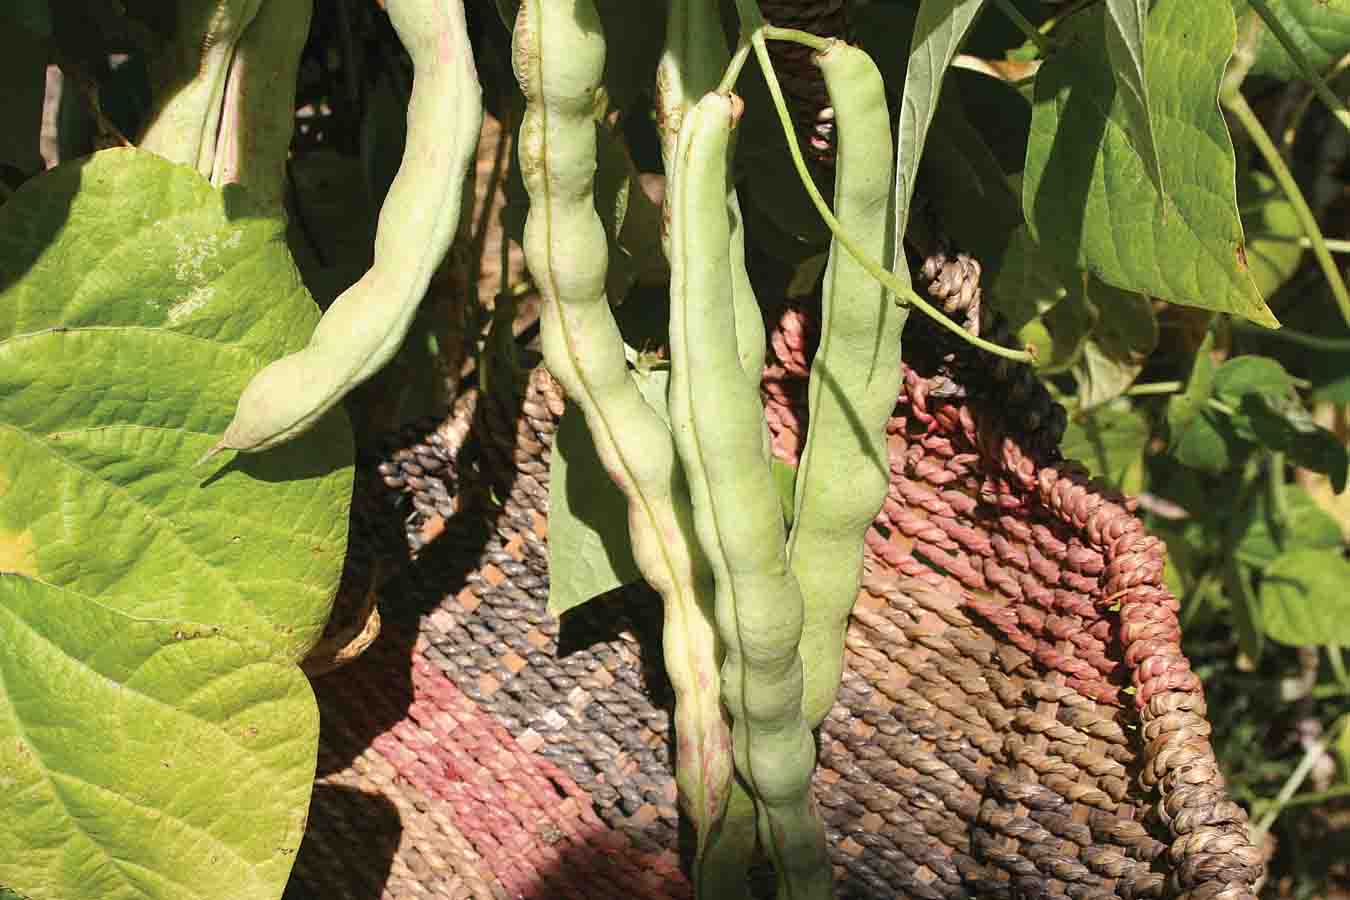
Many beans, such as these Crawford beans, are used as a snap bean, shell bean, and dry bean depending on when you choose to harvest them.
Snap beans come in a huge variety of shapes, sizes, colors, and growing habits. Basically, most snap beans either grow as bush beans or pole beans. Bush beans grow as a plant about 18 inches tall and require no stakes or trellises. Pole beans, on the other hand, are vigorous climbers and must have a sturdy trellis or poles set up for the vines to climb on.
Among both bush and pole beans, you will see wide, flat Romano-type pods and slender, round pods. Many Romano beans are from Italy, but others are of Native American origin, or are from such diverse countries as Germany, England, and Russia.
And talk about colors! We grow beans which have such beautiful colors, not just in the pods but in the beans themselves. This is most noticeable in dry beans as the colors intensify.
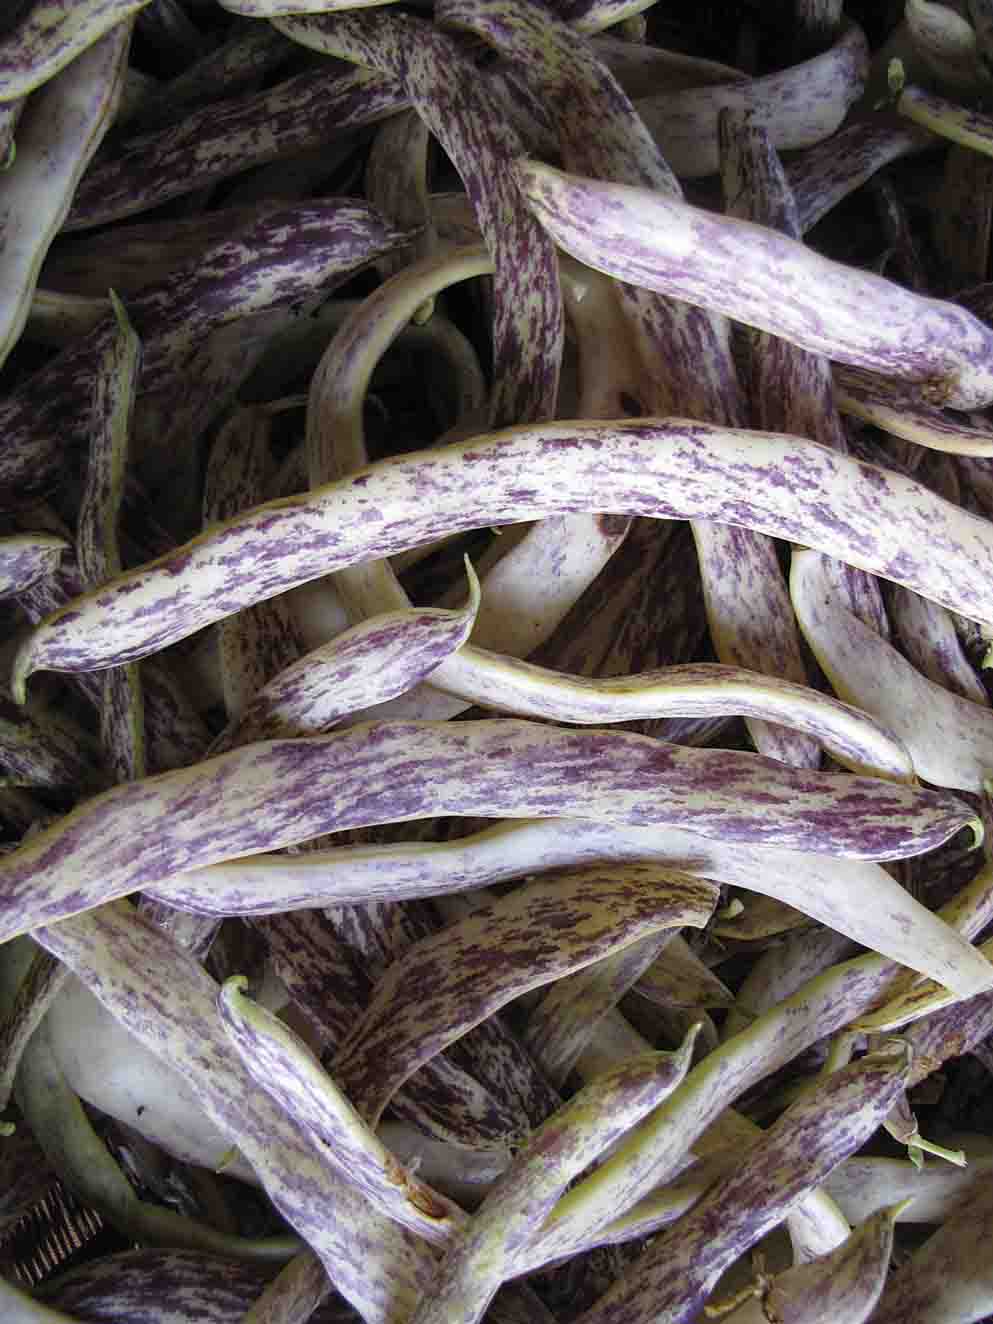
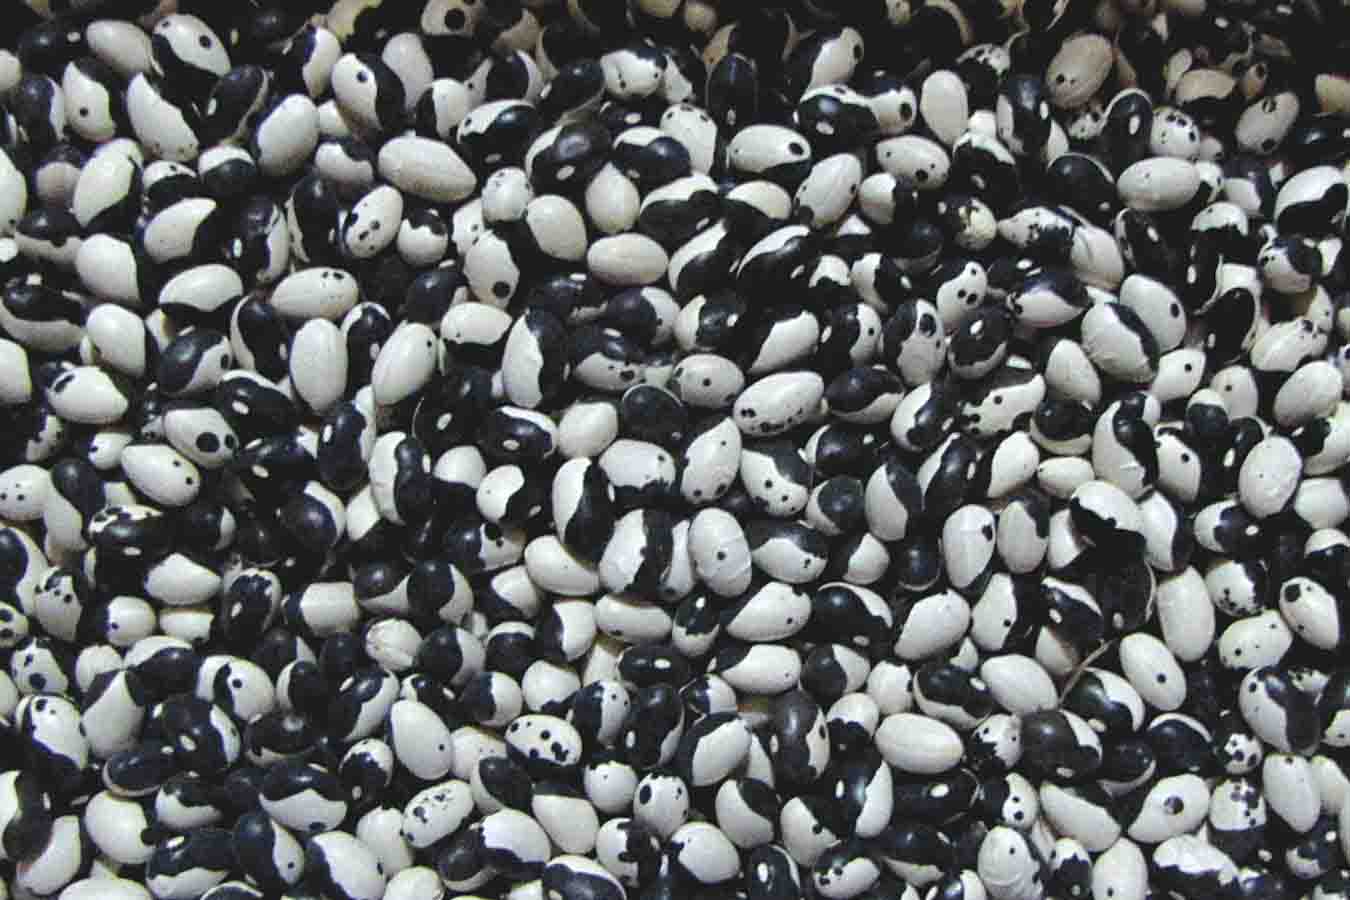
There are Iroquois, Magpie, and Orca beans, being black and white spotted, glistening like jewelry. Then there are various Horticultural beans with pods that are splashed with bright red and white. You can find purple striped yellow pods on Dragon Tongue bush snap beans and Cherokee Trail of Tears green and purple striped snap pole beans which dry to a glistening black. Velour and Purple Dove pods are a stunning purple, but when you cook them they turn to a vivid green! The kids like to watch the magical transformation.
Shell beans
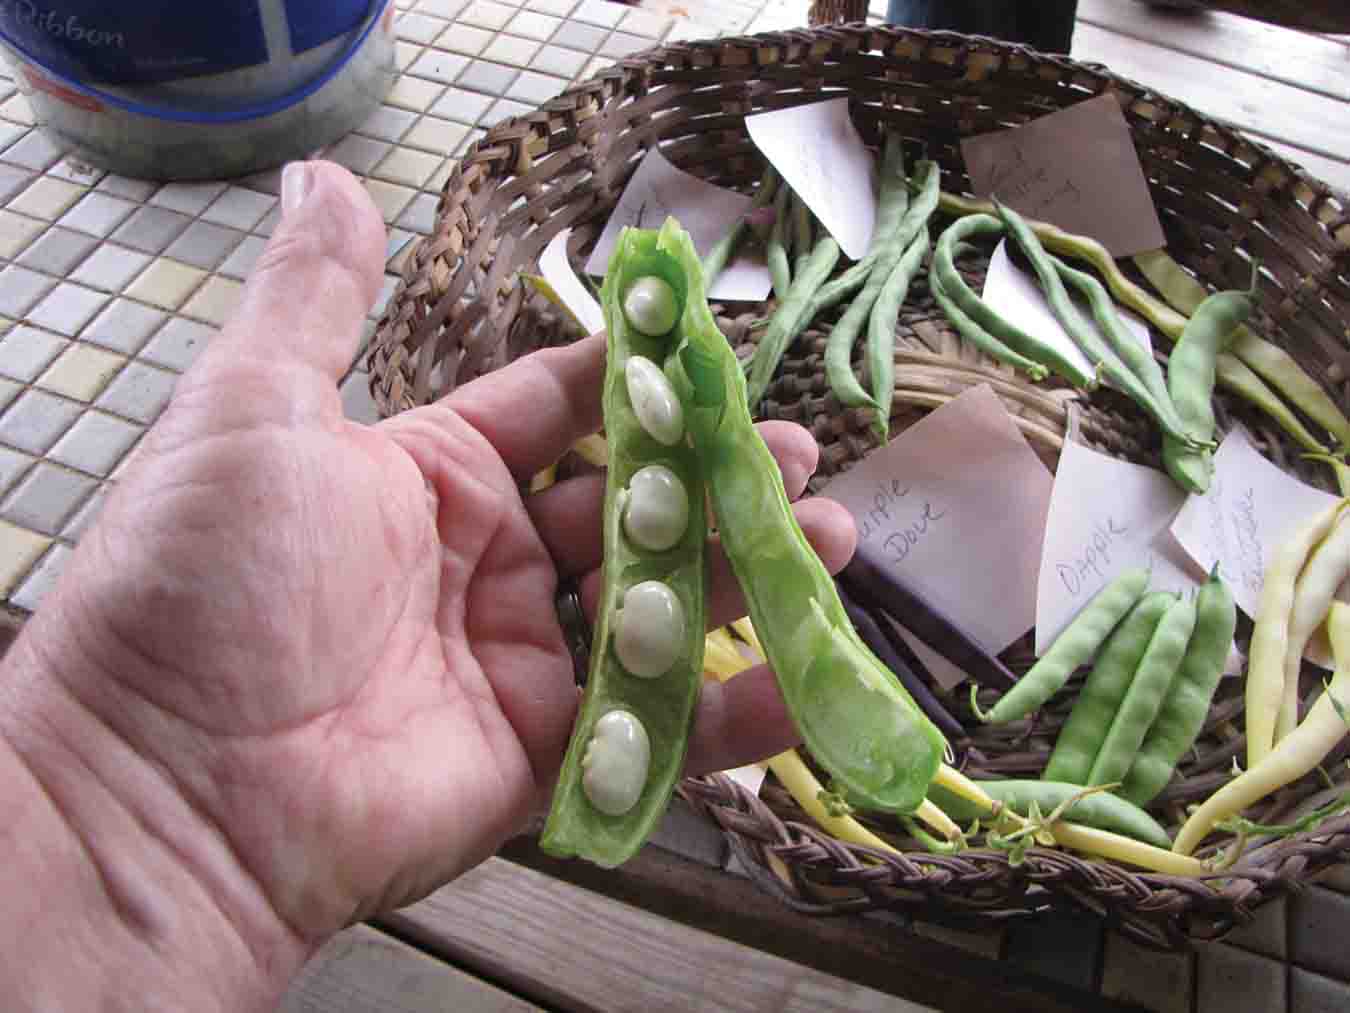
Shell beans can be from either pole or bush plants and are eaten when the seeds are past the snap bean stage but are still juicy and tender. They are eaten much like English peas, right out of the pod, often boiled quickly to preserve flavor. Many varieties grown primarily as snap or dry beans are relished as shell beans at this stage as well.
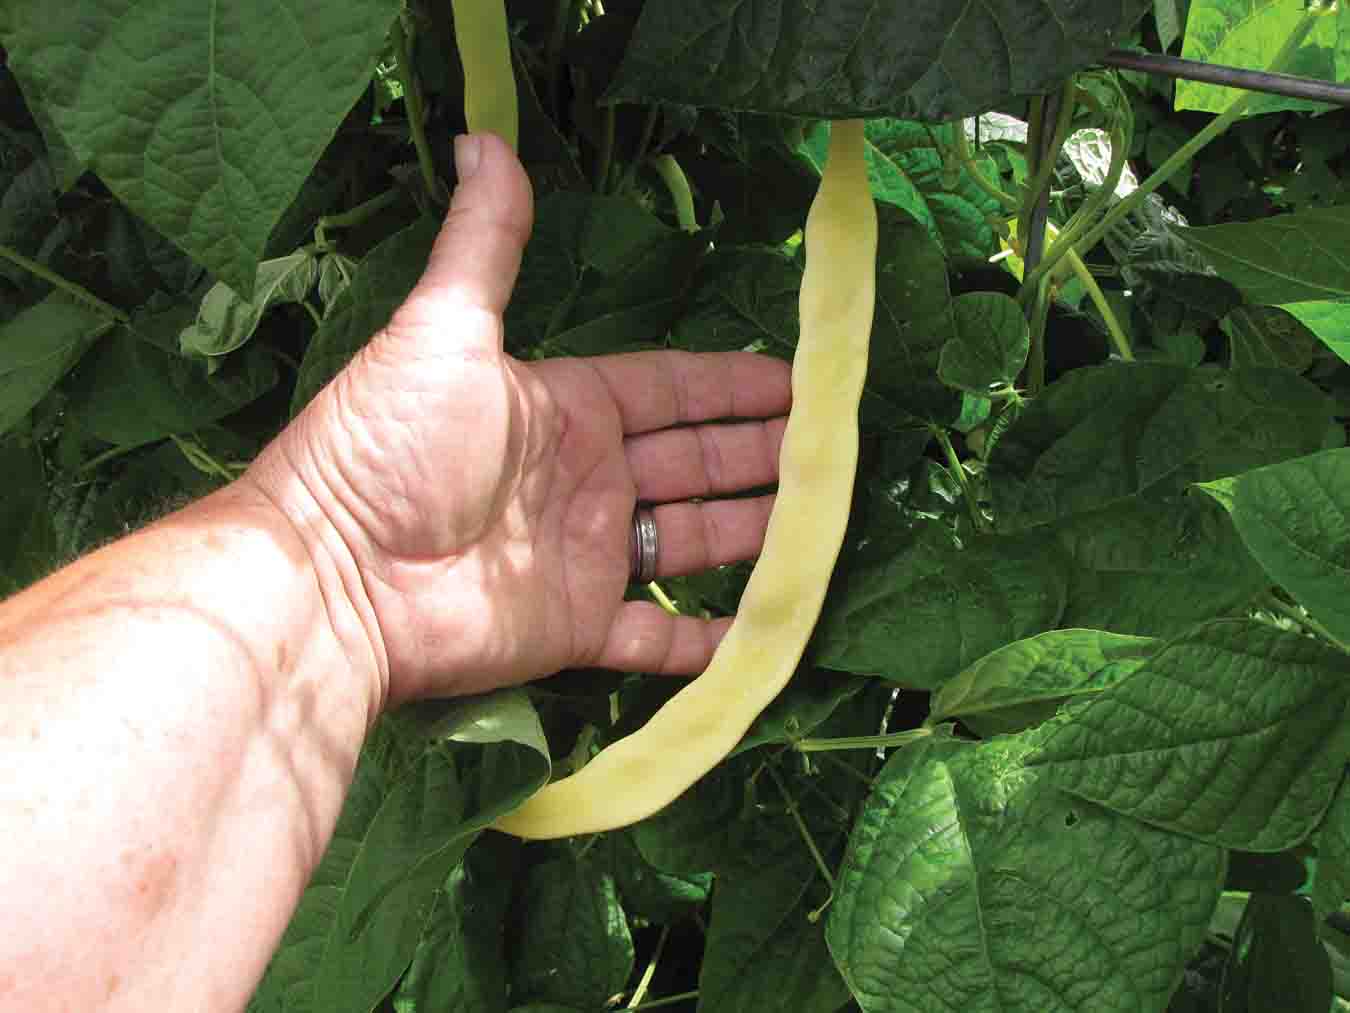
Gold Marie Vining, a Romano type bean, (top photo) and Monte Gusto (below) are both productive pole beans.
Dry beans
Where snap beans are grown for their tender, immature pods, dry beans (Phaseolus vulgaris) are allowed to mature and dry inside their pods. They are then removed from their pods and stored for use.
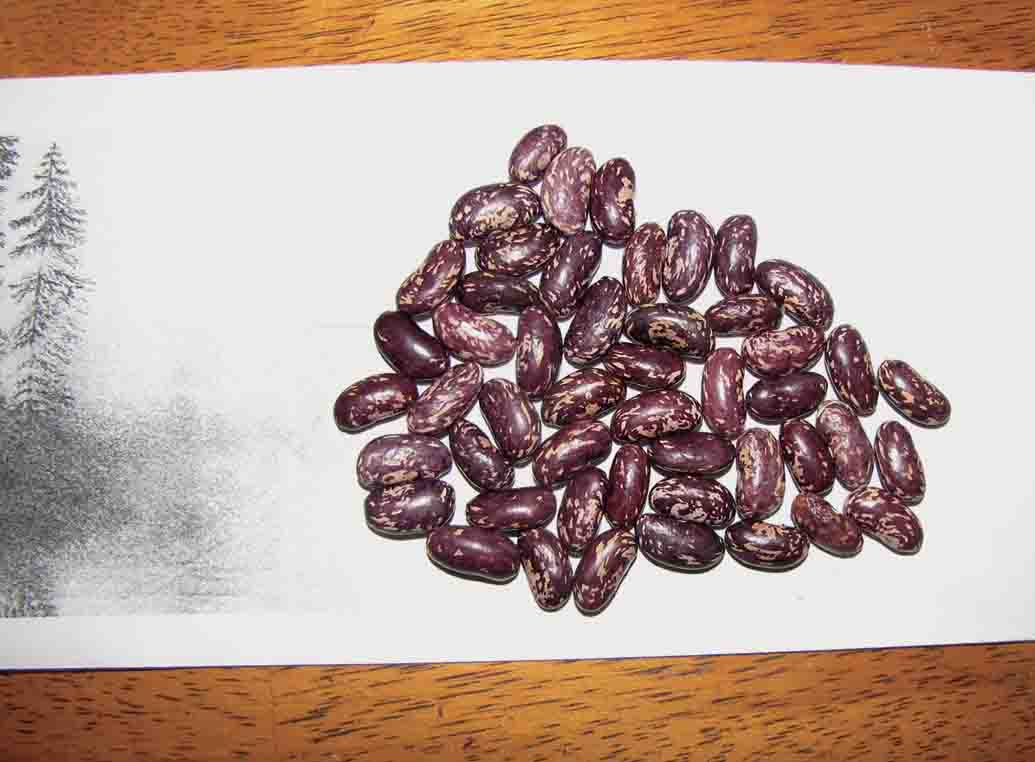
We grow dry beans which are red and white spotted, like Jacob’s Cattle Beans and Monachelle di Trevio as well as all the solid colors from white (Mandan White) to black (Black Manitoba and Cherokee Trail of Tears).
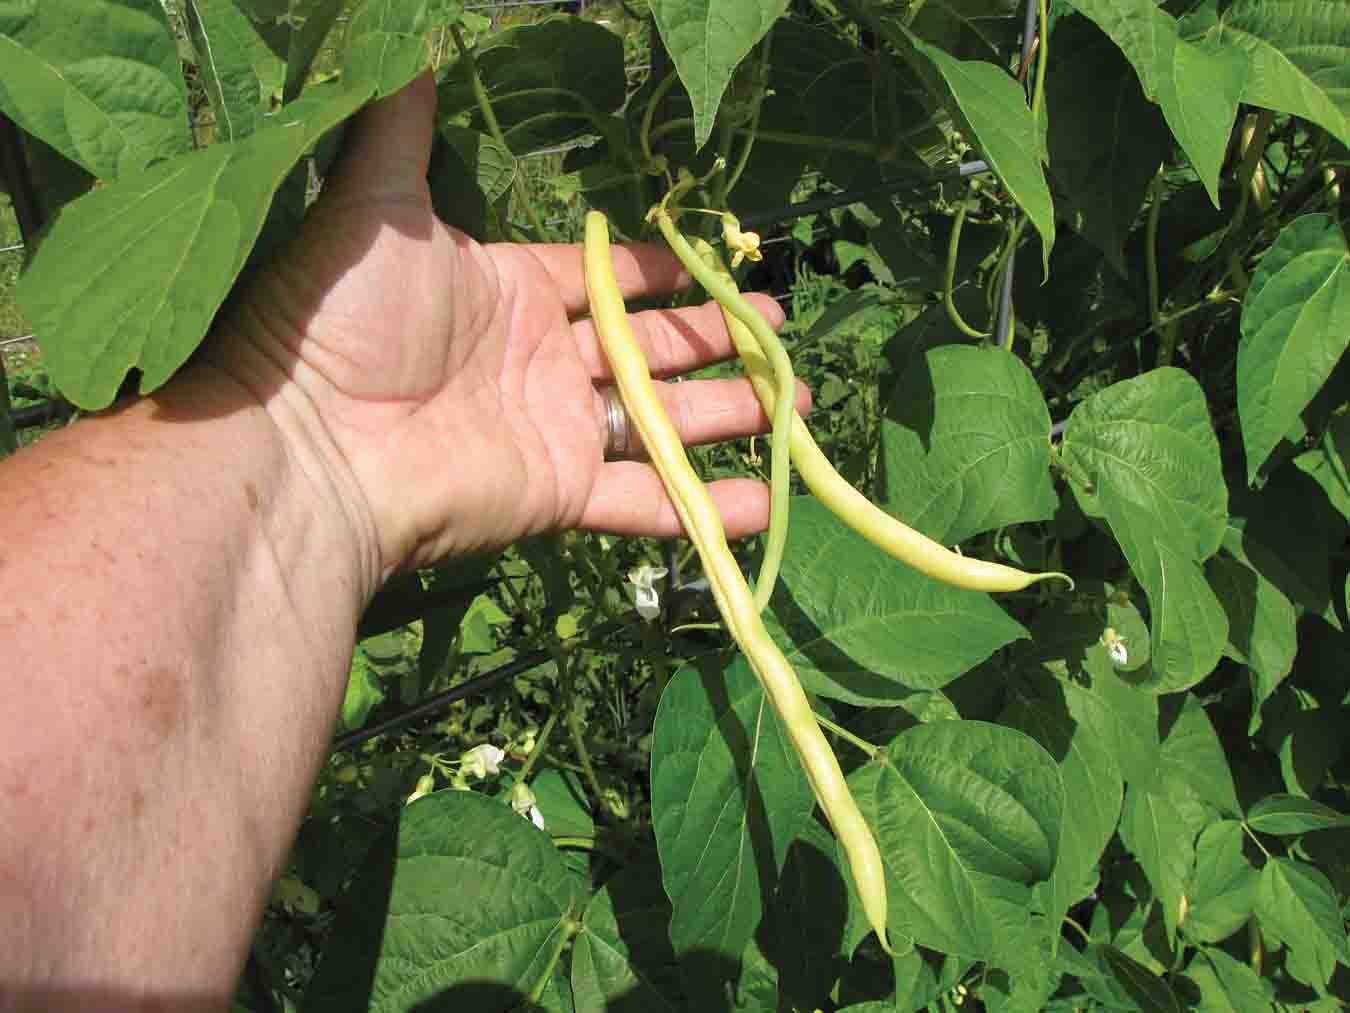
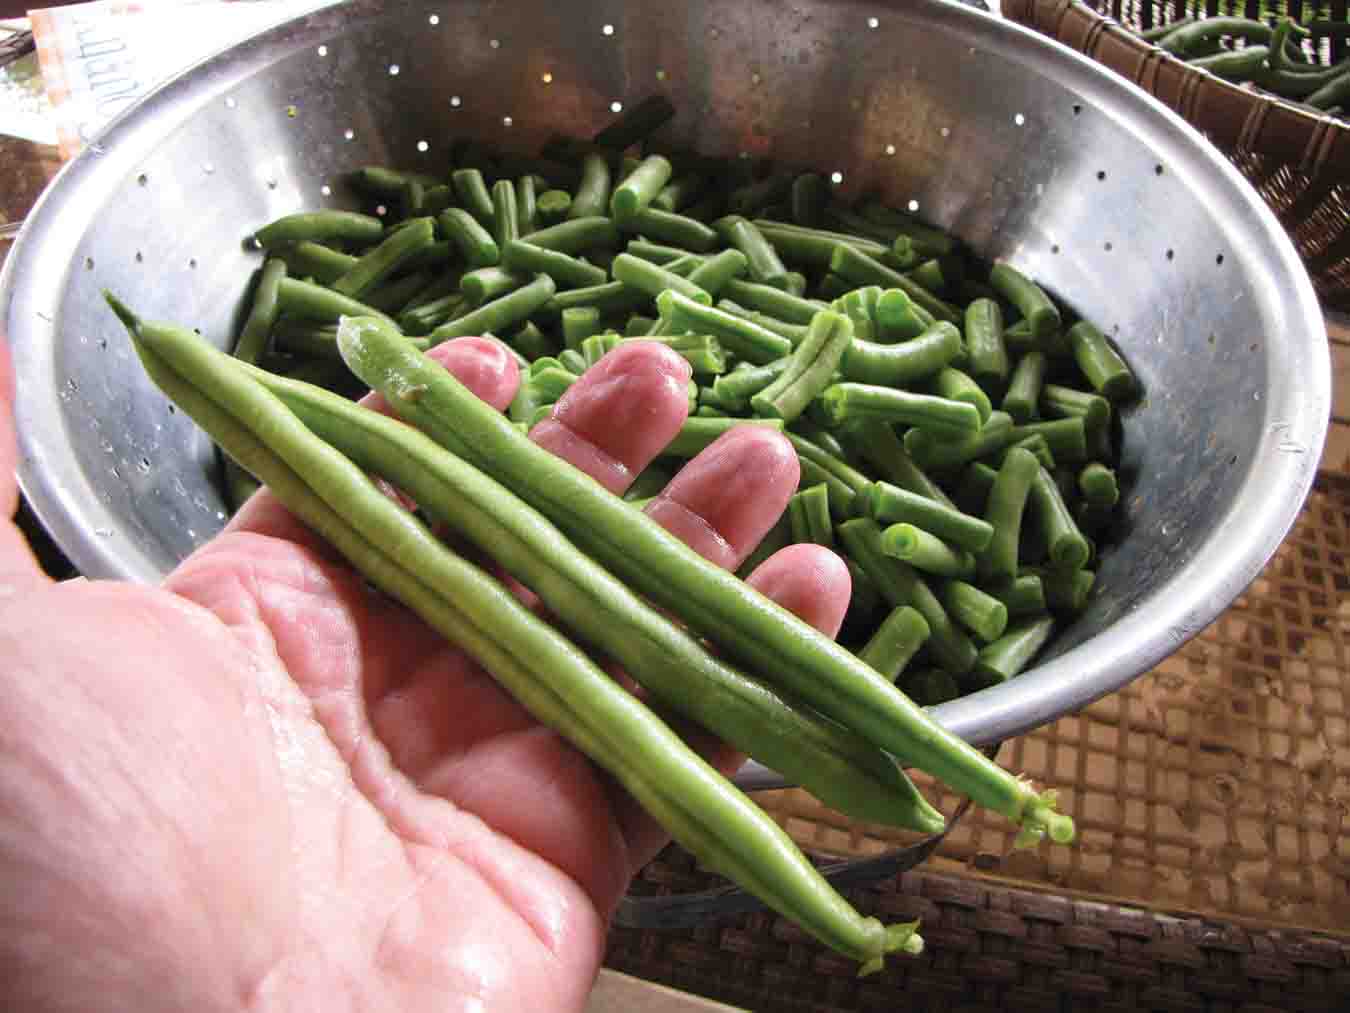
Looking for a more refined bean? Grow French fillet beans, also known as haricots verts (they’re not all from France). These beans are best eaten when from four to five inches long, as that’s when they’re most tender and sweet. Some common fillet beans include Masai (bush), Maxibel (bush), and Fortex (pole). We also grow Monte Gusto, a yellow, thin podded pole bean we just love.
Let’s not forget yellow wax beans. They were Grandma’s favorite and one of ours too. Their flavor is generally milder and sweeter than other beans. Wax beans come in both pole and bush varieties as well as both round, thin podded, and Romano-style pods.
How about trying Runner Beans? We grow several varieties such as Scarlet Runner with huge purple and black spotted dry beans and bright red flowers, Folsom Indian Ruin Runners with giant, fat white dry beans. It’s often said runner beans can be used as snap beans but I think the pods are too tough, even when young. But the dry beans make great soup and stewing beans and are simply gigantic!
Then there are limas (Phaseoulus lunatus), which excel where temperatures are quite warm. It’s a struggle to grow them here in Northern Minnesota, but I have had luck growing them in our hoop houses and starting the seeds indoors. Like other beans, limas come in both bush and pole varieties and many beautiful colors including white, black, spotted, and striped.
When we lived in New Mexico, I also grew tepary beans (Phaseolus acutifolius). These ancient Native American beans from pre-Columbian times grow on sturdy bushes and produce a huge bounty of small dry beans, especially in arid climates. Like other beans, tepary beans come in several colors from white to black. My favorite is a light tan with navy blue speckles fittingly named Blue Speckled Tepary. These beans develop quickly and produce heavily. I also love that they cook up quickly, requiring only about the same cooking time as lentils.
How about Fava beans (Vicia faba), which are also called Horse or Broad Beans? These large beans have been grown for centuries and have been used in countries far and wide, including India, Mexico, Italy, and Brazil. They are well-adapted to cool climates and do not do well in hot, dry summers. They can be eaten as fresh, shelling beans or as dry beans in a variety of recipes. They are sweet and meaty.
Then there are Cowpeas (Vigna unguiculata), also called Lady Peas or Black-Eyed peas. These are a Southern delight, having been grown there for centuries, brought to the New World by slaves from Africa, where they are the longest grown domestic crop. They can be erect bushy plants with some runners or pole varieties, requiring trellising or poles upon which to climb.
They are most often grown as shelling beans and cook up quickly. They can also be allowed to dry and eaten as a dried bean in soups or stews.
Along with “regular” cowpeas, you also have yard long beans such as the Red Noodle Yard Long and Asparagus bean. These have long, pencil thin pods from 14 to 18 inches or even more in length. (No, they don’t usually reach a yard long.) They prefer climates where nights are dependably warm. Yard Long beans can be eaten as snap beans or cut and used in stir-frying.
As if this was not enough, there is still the soybean (Glycine max). Soybeans originated in China over 7,000 years ago. This ancient bean has experienced a surge of popularity as the Japanese method of cooking took off in the U.S. and Canada, especially. The Japanese call them “edamame” (e-da-ma-may), boiling them raw and popping them out of the pod, salting them, and eating out of hand like beer nuts.
All soybeans I know of are bush-type plants, producing scads of beans on bushy, vigorous plants. They do especially well in seasons with warm summers.
The purple stripes on these Dragon Tongue beans will disappear when cooked.
Planting beans
When you’ve selected your bean varieties, it’s time to plant. While beans of the same species (check the botanical name) can cross, if you separate varieties of the same species by several feet, they will seldom cross, so you can feel comfortable that you’re saving pure seed from each variety, as long as they’re not too close.
Beans are a warmth-loving crop. Seeds should be directly seeded into the garden, but do not plant them in cool, damp soil or the seeds will rot. (One exception to this is the fava bean, which loves cooler weather.) The optimal temperature of the soil for best germination of most beans is between 75 and 90° F. Bush beans are planted in rows with the seeds covered by about an inch of soil, about four inches apart. We plant our bush beans in double rows with the rows being about a foot apart in order to get more beans per square foot of garden space. However, in some climates, disease is a problem so they are better planted there in single rows about three feet apart to facilitate good air flow among plants.
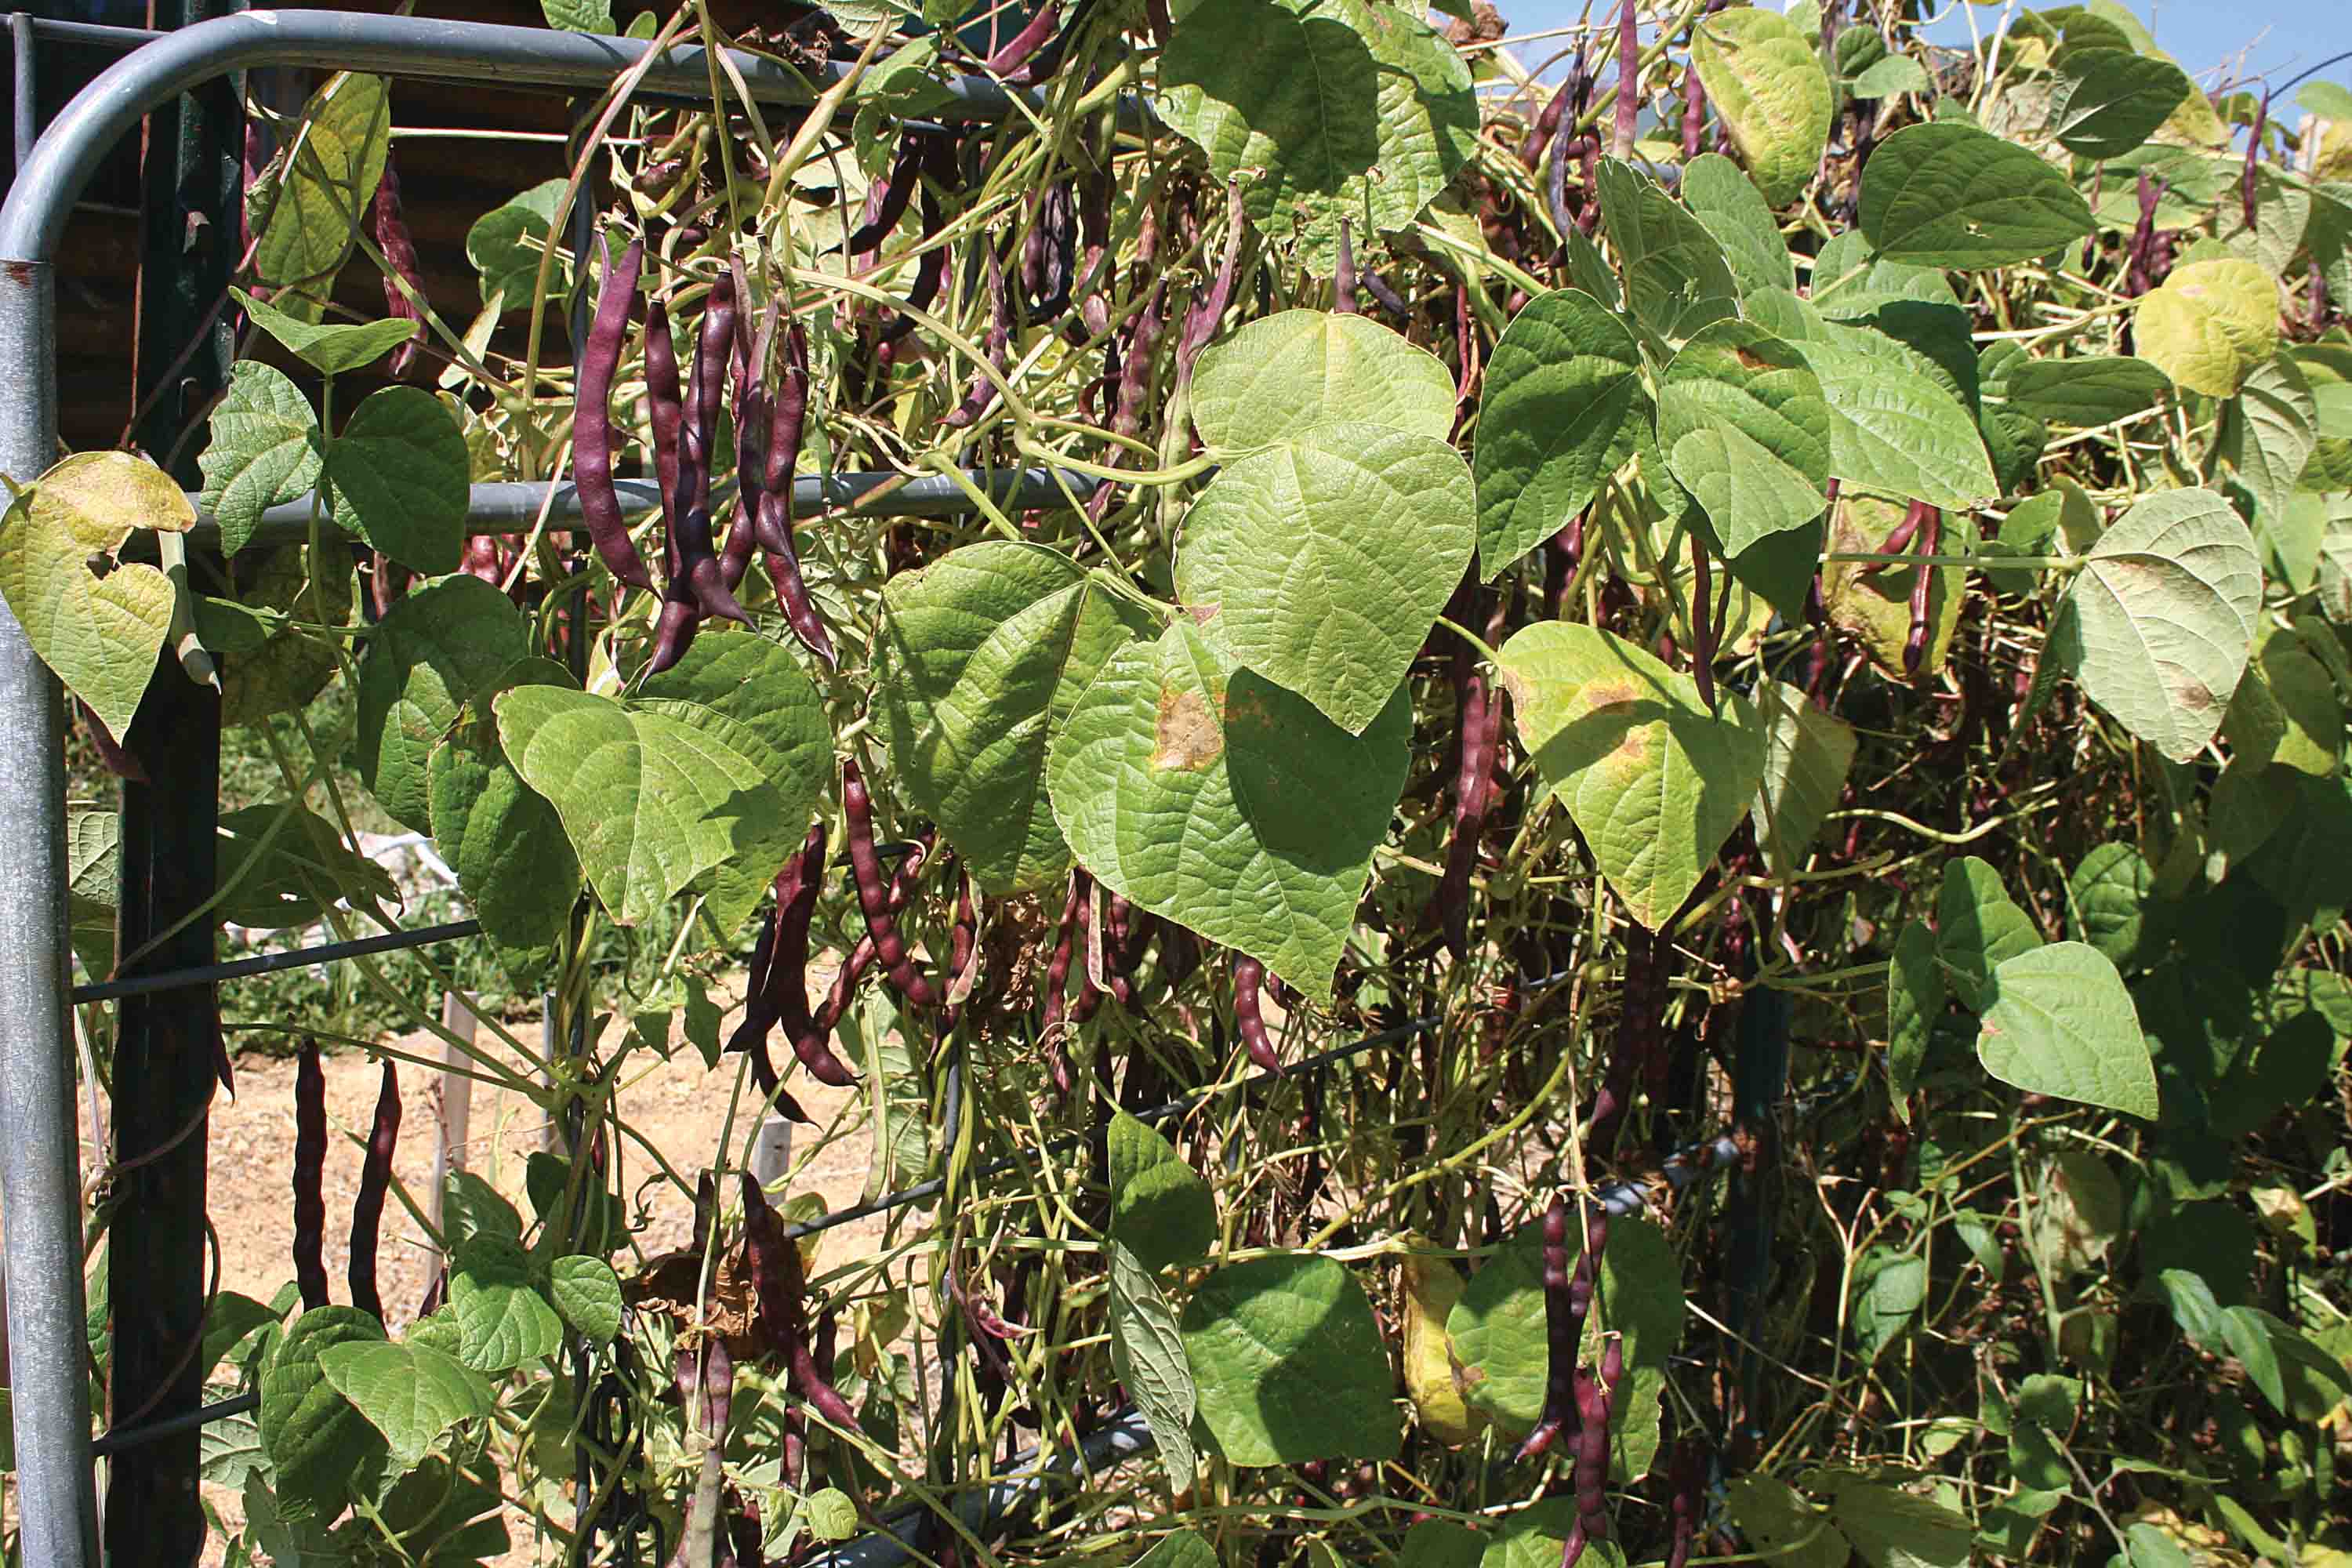
Pole beans are planted along a trellis or around poles. We find that 16-foot long cattle panels (constructed of heavy gauge welded wire) tied onto 6-foot steel T-posts makes a very sturdy, long lasting trellis for pole beans which lasts for decades of reuse. We plant our pole beans on both sides of the trellis to save garden space.
Many gardeners plant their pole beans around poles. Some point the slender 6-foot posts and set them into the ground every 18 inches or so along a row, planting four or five beans around each pole. Others fashion three or four pole “tipis” with the legs spread and just sitting on the ground, with several beans planted around each leg.
Water regularly if sufficient rain does not fall and they will grow quickly. Beans do not compete well with a flock of weeds, so stay on top of your weeding.
Harvesting your beans
Snap beans are often ready for harvest starting about 60 days after planting, depending on variety and growing conditions. Once they begin to bloom, check them often. On close inspection, you’ll see tiny, baby beans attached to the flowers. These grow quickly once the bloom drops. Be sure to lift the leaves of bush beans because the plants will often set their first beans down low, making them hard to spot. If those first beans are not harvested it can seriously affect the final harvest. Once the seeds start to mature, the plant slows down production to finish making mature, dry seeds. If you keep your plants picked regularly, the plants will often produce many waves of tender, delicious beans, right up until frost.
Harvest beans used as snap beans while the seed is small and has not started to make a bump in the pod. At that stage the beans are the most tender and string-free.
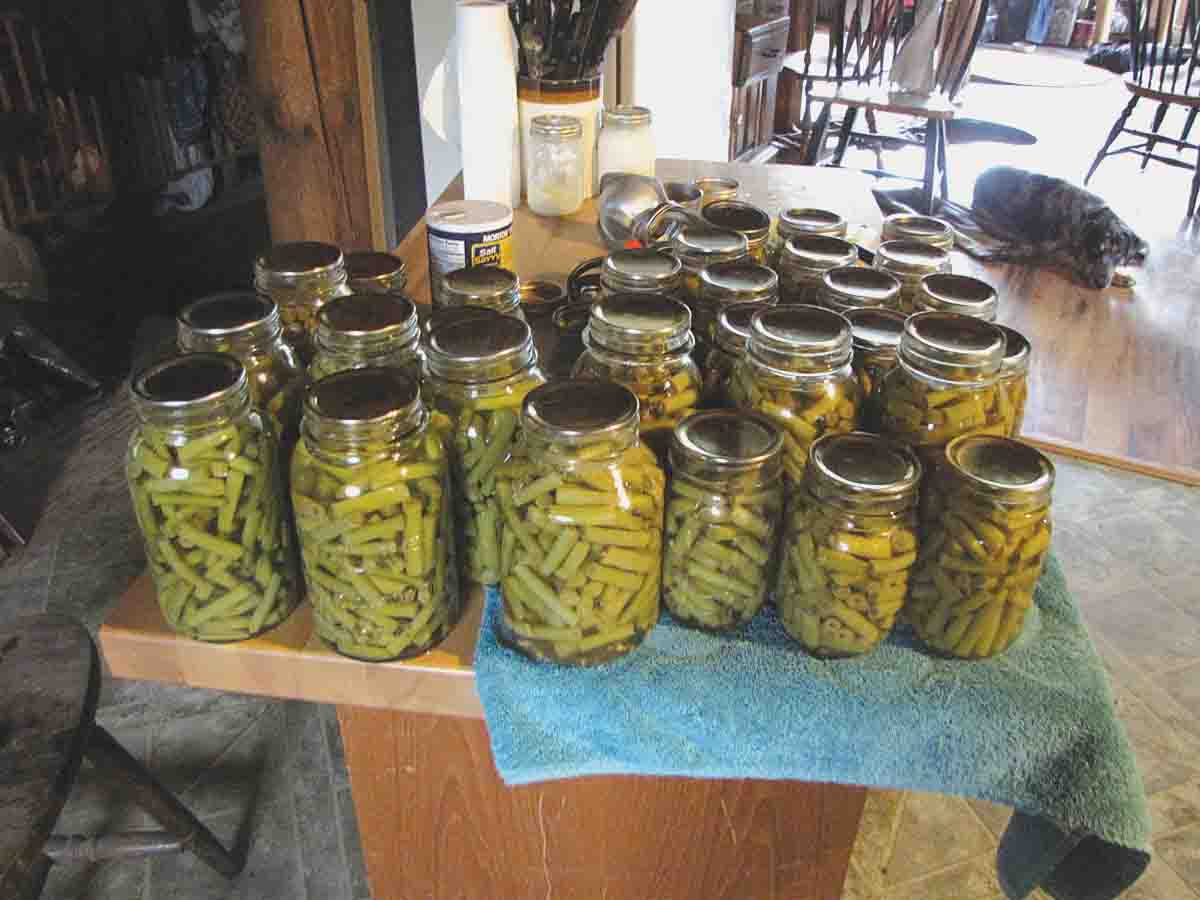
Here’s some of our Provider bush beans getting ready to can.
To harvest shelling beans, wait until the pods begin to bulge where the seeds are forming. You want to shell the beans for fresh use and to can them when the seeds are fat, yet tender and juicy. Like peas, just pop the pods open and shell out your beautiful beans.
Dry beans are left alone to mature fully. The vines and pods will yellow and dry to the point that they rustle when you brush them. Harvest during a dry period. I pick the pods into a container, then bring them to the house where I can comfortably sit and shell the beans on the porch.
If you are fortunate enough to have lots of dry beans, you can pull the whole vines when they are dry and throw them on a clean tarp or into a plastic child’s swimming pool and walk around on them with clean shoes or whack the vines with a baseball bat. (A plastic one is perfect but a wooden bat will do fine, too.) When the pods have all opened, you’ll have a layer of dry beans below the remnants of the vines. Gently lift off the vines and pick out any larger debris. I pour the beans into a large basket or pail then winnow them on a windy day, pouring one basket, held above the other, letting the wind carry away the chaff and dust. When clean, I pour a layer at a time out onto a cookie sheet and hand pick, removing any bad beans or bits of gravel. Once clean, store in an airtight, rodent and insect-proof container. They will keep good for years.
Keep a close watch on your dry bean crop as it begins to dry. Some varieties of beans are notorious for popping open and flinging their seeds onto the ground as soon as the pods dry. When we lived in New Mexico, I had rows of King of the Early bush beans I kind of lost track of in the fall. When I went out to check them, there were beautiful fat dry beans lying on the ground! I had to crawl along the rows, picking up bean by bean. Not very fun.
Shell beans are eaten when plump and tender like this giant Folsom Indian Ruin pole bean.
Canning your snap and shelling beans
We eat lots and lots of beans during the summer months, but we know winter is coming and we all love our beans. So to preserve our summer’s bounty, not only for winter eating but for years to come, I always can up all the beans I am able. They are the easiest of all crops to can. Beans are a low-acid food, as are all vegetables and meats, so you must use a pressure canner to process them. Don’t let this intimidate you. Just follow the directions and you’ll be lining your pantry shelves with rows and rows of beautiful canned beans in no time.
Basic instructions
You can either pack your beans using the hot pack or raw pack methods. I usually raw pack my beans in order to save time.
Always follow general canning directions in your canning book before canning any food in a pressure canner.
Hot pack: Rinse and drain your beans. Remove any strings, trim off ends and break or cut beans into two-inch pieces. For shelling beans, shell beans. Boil 5 minutes, then pack hot into hot jars, leaving 1 inch of headspace. Pour boiling water to cover the beans, leaving 1 inch of headspace. Remove any air bubbles. Add ½ tsp. salt to each pint or 1 tsp. to each quart if desired. (The salt has nothing to do with safety; it is only for enhanced flavor.) Place new, hot, previously simmered new lids on jars and screw down ring firmly tight. Process pints of snap beans for 20 minutes and quarts for 25 minutes at 10 pounds pressure. Process pints of shelling beans for 40 minutes and quarts for 50 minutes at 10 pounds pressure. If you live at an altitude above 1,000 feet, consult your canning book for directions on increasing your pressure to suit your altitude.
Raw pack: Rinse and drain your beans. For snap beans, remove any strings, trim off ends and break or cut beans into two-inch pieces. For shelling beans, shell beans. Pack snuggly into hot jars, leaving 1 inch of headspace. Pour boiling water over beans, leaving 1 inch of headspace. Remove any air bubbles. Add ½ tsp. salt to each pint or 1 tsp. to each quart if desired. Place new, hot, previously simmered new lids on jars and screw down ring firmly tight. Process pints of snap beans for 20 minutes and quarts for 25 minutes at 10 pounds pressure. Process your pints of shelling beans for 40 minutes and quarts for 50 minutes at 10 pounds pressure.
When your processing time has finished, turn off the heat and allow the canner’s dial to return to zero or the pressure in the canner to go down (weighted gauge). You can tell when it has by gently bumping the weight slightly with a finger. If it makes a hissing noise, it is still under pressure. Wait a few more minutes and try again. When there is no noise, remove the weight. Carefully remove the lid and set it aside.
With jar lifting tongs, remove each jar and place on a dry, folded towel in a draft-free area to cool. Do not touch the jars until they are cool; this will take several hours at least, so I often leave them overnight. When cool, remove the rings and wash the jars in warm, soapy water, then dry the jars. The rings are not required to maintain the seal, and can actually cause seals to fail early if not removed because they can trap moisture and food bits, leading to rust. The rust eventually eats through the lids and ruins the food inside.
One of our pretty dry beans is Mesabi bush bean, a pretty purple striped gem.
Orca is a stunning black and white dry bush bean.
Canning dry beans
I’ve found I really love my canned dry beans. So often I get the urge to have some refried beans or baked beans and haven’t set a bowl out to soak overnight, as I should have. (Unsoaked beans take forever to cook and often remain hard even then.)
So I can up dozens and dozens of all types of dry beans so I can throw together a meal or side dish in minutes … without having to pre-think my meals for the next day. I can pintos for refried beans, black beans for soups and stews, beans for chili, and beans for a baked bean supper. It’s so convenient and when you can up your own beans, you can choose to eat the varieties you like best and not be limited to only the ones available in the store.
Blue Shakamaxon beans from the Delaware tribe, used chiefly as a dry bean.
It’s a nice feeling to have jars of beans available for any meal.
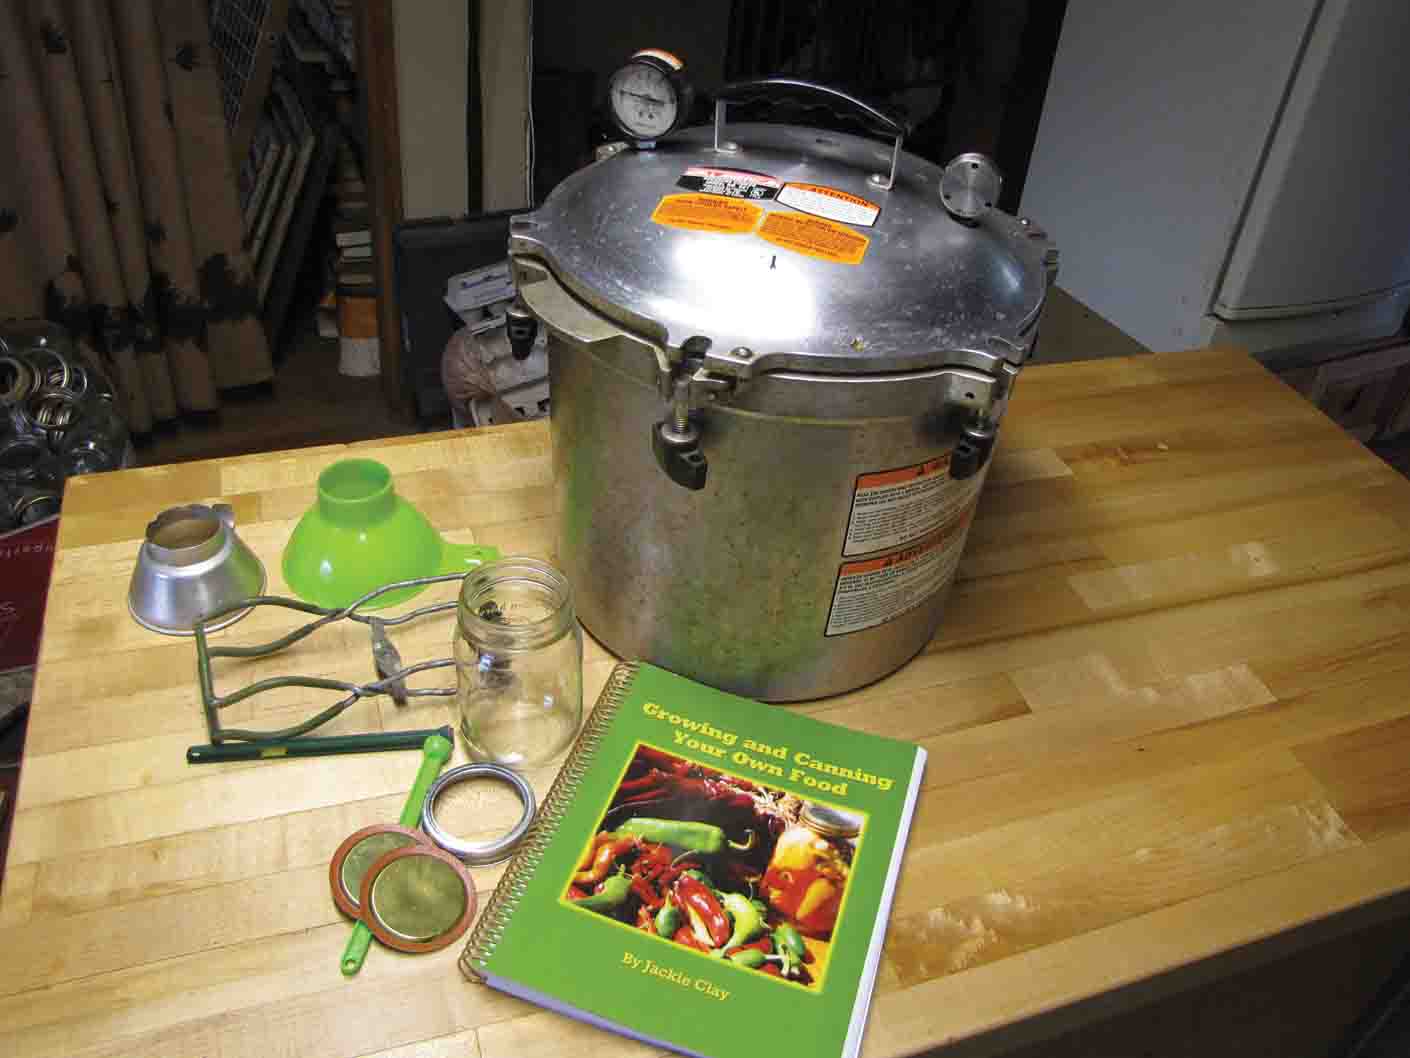
Getting ready to can beans; Pressure canner, lids, rings, lid lifter, jar lifter and canning manual
Hurry up method for canning dry beans
Rinse dry beans, cover well with boiling water. Boil for two minutes. (This is not a typo!) Remove from heat and let soak, covered, for two hours. Heat to boiling and drain, saving liquid. Pack jars ¾ full with hot beans. Add a small piece of fried lean bacon or ham, if desired. Fill with hot cooking liquid, leaving 1 inch of headspace. Wipe rim of jar clean. Place hot, previously-simmered new lid on jar and screw down ring firmly tight. Process pints for 75 minutes and quarts for 90 minutes at 10 pounds pressure in a pressure canner.
When it comes to canning up your bean harvest, don’t forget to put up some other bean based foods. How about making dilly beans, mustard bean pickles, bean soup, bean stew, baked beans, chili, and other delectable treats. We thrive on variety, and there is such a variety of ways beans can be prepared, it’s a shame to only can snap beans!
Think about adding some different kinds of beans to both your garden and your pantry this year. Add some gourmet flavor to your family’s table and enjoy!
This is one of the best articles on beans I’ve ever read and I read a lot of them. I wish I had read this years ago when I was starting out.
Hi Jackie—
Unrelated to your article here, but I had to tell you how wonderful it is to have found your blog. I have been reading all afternoon and am so impressed by the way you live your days. I often dream of living that life. Currently, I’m in a hot climate and in a suburban area, but I find little ways to learn the skills you effortlessly use day after day. One day, my husband and our six children will live in the Bush too. Until then, you’ve found a faithful reader. Thanks again so much! Ps, do you have an maple trees where you live?