By Melisa Mink
Whether it’s from a newly-freshened heifer or a nanny goat, you might at some point find yourself with an abundance of milk. People use up excess milk by drinking it, canning it, churning it into butter, fermenting it, and freezing it. But there are more ways to make your milk stretch into other usable products.
All around the world people have used milk to nourish their skin. Cleopatra bathed in it. The triglycerides in buttermilk are fabulous at moisturizing skin. If you have extra milk, how about making soaps? Once you have a tried and true recipe, it is really easy. Plus, there’s no better way to make every dollar stretch than to make everything you can yourself.
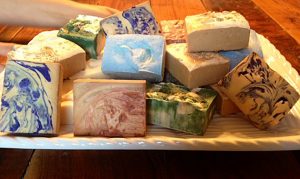
Soap making is not what it used to be; it has become fairly easy to do and you can buy harder-to-find ingredients like lye (sodium hydroxide) and essential oils online. When I first started making soap and body products to help relieve my son’s problem with eczema, it seemed that no remedies we bought ever worked. Out of necessity, I started making homemade milk soaps. After all, as the old saying goes, “If you want it done right, do it yourself.”
I would buy fat from the butcher and render it (cook down to purify). Then, I would get milk from others who had animals. It took a very long time from start to finish before I was able to hold a bar of soap in my hand — and then it had to cure for a month. I also had to figure it all out myself, and threw tons away in the process. Since then, I have discovered that there are easier ways to make soap. Now I use a stick blender, ready-made lye, and prepackaged fats/butters, all of which speed the process up considerably.
Once you’ve been making soap for a while, you will save tons of money since soap can be used in so many ways. Some basic items we have used our soaps for are body & shampoo soap, laundry soap, sensitive skin and baby soaps, toothpaste soap, and dishwashing soap.
Don’t let the mystery of soap making keep you from trying it. I often hear know-it-alls say, “I’d never use lye soap.” That is so funny, because all soap is made with some form of lye.
Soap-making equipment
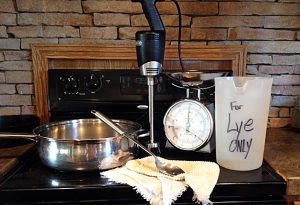
Only use glass, stainless steel, or heavy-duty plastic when using lye. Other metals react and wimpy plastic melts.
- Sturdy plastic or glass pitcher that can withstand high heat, labeled “for use with lye only”
- Stainless steel pot or Dutch oven
- Stainless steel stick blender
- Kitchen scale
- Large stainless steel ladle
- Rags, in case of a spill
- Heavy duty metal or plastic mold pan for soap to set up in
Milk soap
This basic soap uses inexpensive ingredients and your own farm-fresh milk product. If you want to try it and don’t actually have “homegrown” milk, no problem. You can use regular milk, goat milk, buttermilk, almond milk, or coconut milk (even rehydrated powdered milk would work). When using milk to make soap, remember it must be mostly frozen. This protects the milk from scorching. You could end up with curds of scorched milk that will not blend into the soap if it’s not cold enough to combat the high temperatures of the lye. The lye and essential oil can be purchased for a great price at www.bulkapothecary.com. You can buy lard in 4-pound or 25-pound containers at most discount grocery stores.
Once you have mastered this recipe, you can change it up to fit your own family’s needs and budget. You could even try replacing some lard with coconut oil, or another firm fat like organic shea butter.
Warning: Lye is a hazardous material and should only be used by competent individuals. When using lye, always wear proper safety attire such as gloves, goggles, an apron, and a mask. Lye can burn you with just the slightest drop. If you get any lye on your skin, use vinegar immediately. It cuts the lye’s effectiveness. I keep a bottle of vinegar close when making soap, and you should too.
24 oz. pre-frozen and slightly thawed milk
10 oz. lye beads (follow manufacturer’s instructions for preparation)
3 lbs. 6 oz. lard
1 oz. sweet orange essential oil
The first time you make soap, you really need to pay attention to what you’re doing, so make sure you won’t have any distractions. To start with, place the 24 ounces of frozen milk into your lye pitcher. Weigh, bag, and freeze the milk ahead of time to save yourself some trouble.
Place lye pitcher in the sink and put a little water around the pitcher, but not in it. This will help cool the lye when you add it to the milk.
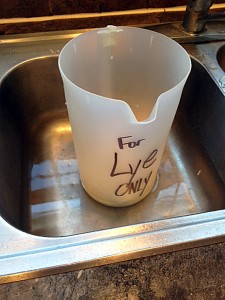
The water around the pitcher will help cool the lye.
Next, melt lard in a Dutch oven or large pot over medium heat.
Carefully measure and add the lye to the pitcher. Never pour liquid into lye — there would be an explosive reaction. Always pour lye into liquid. Slowly pour the lye into the pitcher and keep your head back so little drops will not splatter on your face. Stir lye into the milk and it will begin to melt the icy chunks. It may make a cooking sound, and that’s fine. The mixture will also turn an orange/brown color due to the lactose (milk sugar) caramelizing. Open a window or turn on a fan to help circulate the air if the smell gets irritating. Let the mixture set to cool down a bit.
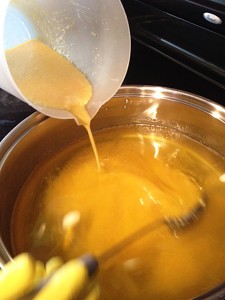
Keep your head back while pouring lye into the milk; it splatters.
While it’s cooling, check to see if the lard has melted; if it has, then turn off heat. Wait about 5 minutes.
Move pot to a cool place for mixing. Once lye has cooled a little, very slowly pour lye-milk into the melted lard pot and stir slowly to avoid splashing. Mix with a stick blender until it has a batter-like appearance. This may take 2-10 minutes. Once it starts to blend together and looks thick, add the essential oil. Keep blending until looks like pudding. Once you reach that point it’s almost done.
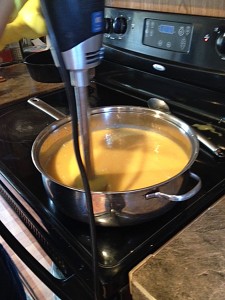
After mixing with a stick blender, the soap will look like pudding.
Pour the soap into your mold and set someplace out of reach of kids, cats, dogs, or spouses. They will all want to stick their hands/noses in it, thinking it’s cake batter, frosting, or something yummy to eat. I always put it up on top of the refrigerator, covered with a towel. Out of sight, out of mind! Every few hours, check for firmness by gently pressing a gloved finger into the soap.
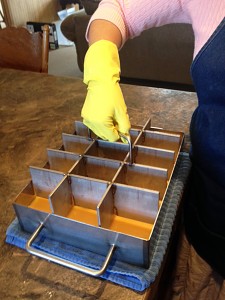
You can use any type of mold that lye won’t eat through, but my favorite one to use is this stainless steel mold. The bars come out perfectly even.
Once it is firm (but still soft enough to cut), turn it out onto waxed paper, butcher paper, or a large cutting board so the lye will not eat through your countertops. Make sure to wear gloves, as it’s still caustic. Score the top of the soap block with a ruler to ensure you will cut straight lines. Then cut into bars, using a putty knife or thin-bladed knife. These tools will help to keep the soap from breaking apart as you cut. Put the soap on a glass or plastic tray and place in a protected location to cure for about two weeks. I use a pantry on a high shelf, or on the refrigerator again. The lye in the soap can still irritate and burn skin until it is cured.
When cleaning up after making soap, be careful. I fill up one side of the sink with warm soapy water and let everything soak for a minute. Make sure you wash the dishes while wearing gloves. Use vinegar to cut the lye if it gets on your skin or counters.
Milk, honey, and oatmeal soap
To the milk recipe above, add the following with a stick blender once the soap has thickened slightly.
½ cup of oat powder (mix in slowly)
½ cup honey
whole oats, for sprinkling
Blend the above ingredients into the soap mixture very well. The honey will brown intensely and soap will thicken even more. Pour into mold, then lightly sprinkle whole oats on top for looks.
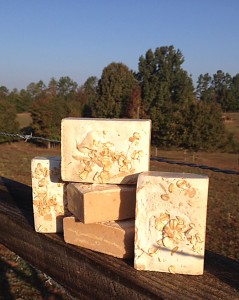
Milk, honey, and oatmeal soap looks picture-perfect with oats sprinkled on top.
Plain ol’ lye soap
If you wanted to use the milk soap recipe to make a basic soap without milk, you can do that. Just use water in place of milk and 0.75 ounces of peppermint essential oil in place of orange. This will give you a wonderful old-fashioned basic lye soap. The peppermint isn’t necessary, but it helps hide the strong lye smell. We mix this soap with baking soda or peroxide to make a “toothpaste.” As with all toothpastes, do not ingest! It also makes the best laundry soap and dishwashing soap I’ve ever used.
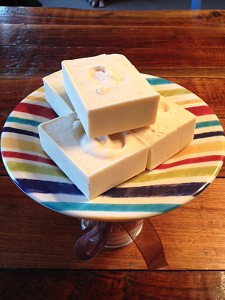
Plain soap can be used in so many different ways!
Remember to be careful when using ingredients such as lye or essential oils. They are very strong and you must assume all responsibility for your own actions when attempting to follow this or any other soap recipe. Have fun with it; add any color or fragrances you’d like, but keep the fats, lye, and liquid at the same weights for this particular recipe.
Working to become more self-reliant is fun. Making soap is easy, frugal, and even profitable.


I absolutely love Homestead Milk Soap! The creamy, nourishing lather leaves my skin feeling soft, smooth, and hydrated. The natural ingredients, such as milk and essential oils, give the soap a refreshing, clean scent that is not overpowering. I also appreciate that Homestead Milk Soap is handmade by small, artisanal soap makers and that it is a sustainable, eco-friendly alternative to mass-produced, chemically-laden soaps. I will definitely be purchasing more of this high-quality, natural soap in the future.
Thank you! I have a crazy question? I froze my milk in cubes and did not measure! Would 24 pre frozen oz be the same as frozen?
So excited to try this with our lard and goat milk! Do you know how much percent superfat this soap recipe is?
Thanks for sharing it!